The short answer: sand the wood, apply 2-3 coats of an outdoor-rated product (spar varnish, wood oil, or epoxy), and reapply every 1-2 years depending on your climate. That’s the whole game. Everything else below is just making sure you do it right the first time.
This article contains affiliate links. We may earn a commission from purchases made through them, at no extra cost to you.
✅ Quick Summary, What You’ll Learn:
- The real difference between waterproofing and weatherproofing wood furniture
- Which finish works best: spar varnish, wood oil, epoxy, urethane, or spray sealant
- How to prep your wood properly so the finish actually sticks
- Step-by-step application for both oil and sealant finishes
- How to convert indoor wood furniture for outdoor use, and when not to bother
- Cheap and homemade sealer options that genuinely work (and ones that don’t)
—
What Does It Mean to Weatherproof Wood Furniture (and Why It Matters)
A lot of people use “weatherproof” and “waterproof” like they mean the same thing. They don’t, and knowing the difference will change how you shop for products.
Waterproofing means keeping water from soaking into the wood. That’s it. A simple waterproofing spray or wax can do that.
Weatherproofing is bigger. It means protecting wood furniture outside from rain, yes, but also from UV rays that bleach and crack the surface, temperature swings that cause the wood to expand and contract, and humidity that drives mold and rot. That’s the full picture.
If you’re putting a piece on a verandah, a deck, or in the garden, you need weatherproofing, not just a waterproof layer. A finish that protects against moisture but ignores UV will look gray and cracked within a year. And if your goal is truly waterproof outdoor furniture, you need a system, not just a single coat of spray.
Why Untreated Wood Fails Outside
Raw wood is porous. Water gets in, expands the fibers, then evaporates and contracts them. Do that hundreds of times through rainy seasons and hot summers and the wood starts to crack, warp, and rot.
Even a spool table made from solid hardwood will deteriorate fast without treatment. The good news? You don’t need a professional to fix this. You just need the right process.
—
Best Products to Weatherproof DIY Wood Furniture: Oil, Sealant, Varnish or Epoxy?
There’s no single “best” product. The right one depends on your wood type, how much sun and rain it gets, and how much maintenance you’re willing to do.
Here’s an honest comparison:
| Product | Best For | Durability | Cost | Maintenance |
|---|---|---|---|---|
| Spar Varnish | All outdoor wood | 2-3 years | $$ | Moderate |
| Marine Finish | High-moisture areas | 3-5 years | $$$ | Low-moderate |
| Teak Oil / Wood Oil | Hardwood (teak, oak) | 6-12 months | $ | High |
| Linseed Oil | Budget-friendly projects | 6-12 months | $ | High |
| Epoxy Coating | Maximum protection | 5+ years | $$$$ | Low |
| Urethane / Special Urethanes | Indoor-to-outdoor conversion | 2-4 years | $$ | Moderate |
| Waterproofing Spray | Small pieces, touch-ups | 6-12 months | $ | High |
| Thompson’s WaterSeal | Softwood, fast jobs | 1-2 years | $ | High |
Spar Varnish and Marine Finish
Spar varnish is the gold standard for DIY outdoor wood protection. It was originally built for boat spars (the poles that hold sails), so it flexes as wood expands and contracts. That flexibility is what makes it work outdoors.
Minwax Helmsman Spar Urethane is one of the most widely used versions. It comes in brush-on and spray, blocks UV, and holds up to rain and humidity well. If you’re weatherproofing a dining table or bench for a covered patio, this is where I’d start.
Marine finish goes a step further, it’s designed for boats, so it handles full water exposure. It costs more but lasts longer. Worth it for furniture that gets no shelter at all.
Wood Oil: Best for Hardwood
Teak oil and Cabot Australian Timber Oil are penetrating oils that soak into the wood rather than coating the surface. They feed the wood, enhance the colour of the wood, and build real water resistance over time.
The catch? You need to apply oil every 6-12 months to maintain protection. Picking a suitable oil for your specific wood type matters here, teak oil works well for dense tropical hardwoods, while linseed oil suits softer, more porous species. If you don’t mind the maintenance, oils give you the most natural-looking result.
Linseed oil is the budget version. It works, just dries slowly and needs mixing with mineral spirits for best absorption.
Epoxy and Urethane for Maximum Protection
Epoxy creates a hard, plastic-like shell over the wood. It has the best long-term waterproofing abilities of any option here. The downside is it’s harder to apply, less forgiving of mistakes, and if it fails, refinishing is a bigger job.
Special urethanes, like the formula in Rust-Oleum outdoor products, sit between oil and epoxy. They’re more flexible than epoxy and more durable than oil. Good middle-ground choice.
—
How to Prep Your Wood Furniture Before Weatherproofing (Sanding and Cleaning)
This is where most DIYers go wrong. They skip prep and go straight to applying product. Then wonder why it peels off in six months.
No product can bond to a dirty, glossy, or rough surface. Prep is not optional.
Step 1: Light Sanding
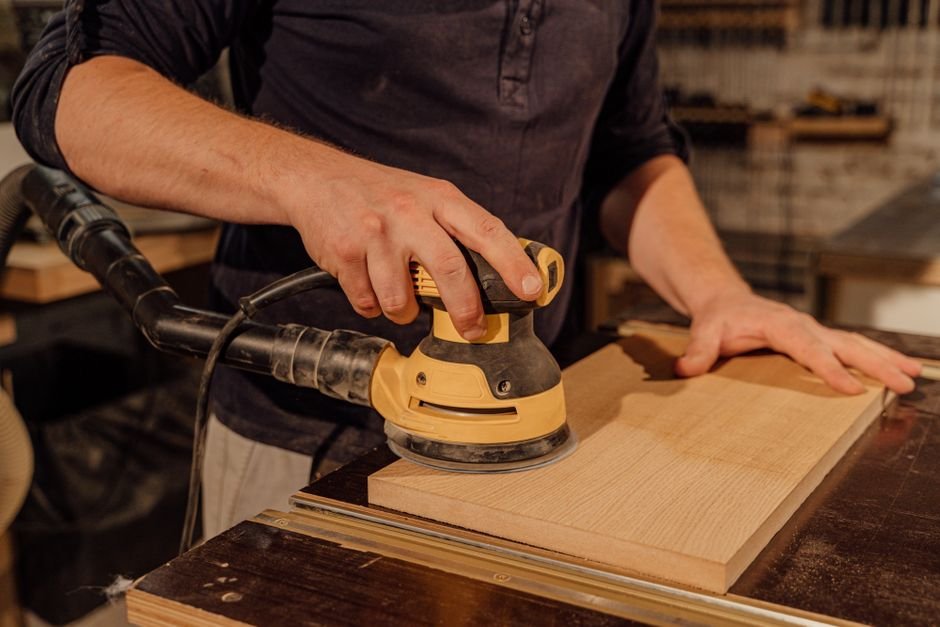
Start with 80-grit sandpaper if the wood is rough, weathered, or has old finish on it. If it’s fairly smooth already, start at 100-grit.
Finish with 120 or 150-grit to smooth the surface. You want to open the grain, not destroy it.
Sand and oil work together, the light sanding creates micro-channels in the wood surface that let oil and sealant penetrate deeper and bond better.
Always sand with the grain. Never across it. Flip the piece upside down and do the underside too, moisture attacks from every angle.
Step 2: Clean Off All Dust
After sanding, wipe down every surface with a tack cloth or a lint-free rag lightly dampened with mineral spirits. Get every bit of sawdust off.
Dust left on the surface will get trapped under your finish and create a rough, uneven coat. This matters more than most people realize.
Step 3: Let It Dry Completely
If the wood is damp from cleaning, wait. Applying any finish to wet wood traps moisture inside and causes bubbling or peeling later.
On a dry day with good airflow, 30-60 minutes is usually enough. In humid weather, give it a couple of hours.
—

Foto: Anna Shvets via Pexels
Step-by-Step: How to Apply Outdoor Sealant or Wood Oil to Furniture
Here’s the process I use. It works for both brush-on sealants and penetrating oils.
Applying Wood Oil (Teak Oil, Linseed Oil, Australian Timber Oil)
1. Stir the oil thoroughly, don’t shake it.
2. Apply a generous layer of oil with a natural-bristle brush or a lint-free cloth.
3. Let it soak in for 15-30 minutes.
4. Wipe off any excess that hasn’t absorbed. Pooled oil stays tacky and doesn’t cure properly.
5. Let dry for 8-24 hours depending on the product.
6. Apply a second coat the same way.
7. For raw or very dry wood, a third coat may be needed.
Set the piece right side up after the underside dries, then do the top surfaces. Flipping old furniture mid-application is normal, don’t skip the undersides.
Applying Spar Varnish or Outdoor Sealant
1. Stir gently, bubbles in the varnish mean bubbles in your finish.
2. Apply a thin first coat with a quality brush. Thin coats cure better than thick ones.
3. Let it dry fully, check the product label, usually 4-8 hours.
4. Do a light sanding with 220-grit between coats to knock down any dust nibs.
5. Wipe clean with a tack cloth.
6. Apply a second coat. For outdoor exposure, always do a third.
7. One good coat isn’t enough, two is the minimum, three is the standard.
The goal when you seal wood outdoor is to build up enough barrier layers that moisture genuinely can’t work its way in, not just to add a surface sheen. That’s why three coats matters more than most people expect.
When to Use a Waterproofing Spray
A waterproofing spray is ideal when:
- The piece has carved details or tight joints a brush can’t reach
- You’re doing a quick touch-up on an existing finish
- You’re working on a smaller piece like a stool or side table
For large flat surfaces like tabletops, brush-on always wins. You get a thicker, more even coat.
If you want a premium finish that doesn’t require you to source products separately, this complete wood protection system covers prep through final coat in one kit, worth checking out before you buy individual cans.
—
How to Weatherproof Indoor Wood Furniture for Outdoor Use
This is one of the most common questions on Reddit r/DIY, and for good reason. You’ve got a solid piece of indoor furniture you love, can you just move it outside?
Sometimes yes. Sometimes it’s a waste of time. Here’s how to tell.
When It’s Worth Doing
Hardwood furniture, oak, teak, maple, walnut, can handle the outdoors if properly sealed. These woods are dense enough to survive repeated moisture cycles.
Solid pine can work too, though it’s softer and will need more frequent maintenance.
If you want to weatherproof indoor furniture for a sheltered spot like a covered verandah or screened porch, the bar is lower. Less direct rain, less UV. A good coat of spar varnish or urethane will do the job.
That said, moving indoor furniture outside, even to a covered area, is a bigger commitment than it looks. Interior finishes aren’t made for humidity swings, and the joints that hold the piece together may not be either. Treat the conversion seriously and it can work beautifully. Cut corners and you’ll be refinishing again in one season.
When to Walk Away
Particleboard, MDF, or any furniture with a veneer over cheap substrate, don’t bother. These materials absorb water at the joints and expand. They’ll fall apart regardless of what you put on the surface.
Also check the joints. If the indoor furniture uses glue-only joinery with no mechanical fasteners, outdoor humidity will soften those glue bonds over time.
The Conversion Process
1. Sand the entire piece to remove the interior finish. Interior lacquers and water-based finishes aren’t made for outdoor use, you need to get them off.
2. Clean thoroughly.
3. Apply a wood conditioner if the wood is very dry after stripping.
4. Treat with outdoor sealant, minimum 3 coats of spar varnish, or 3 coats of marine finish for unprotected spots. Make sure you fully seal surfaces including the undersides, backs, and any end grain, those are the spots moisture attacks first.
5. Replace any fabric elements with washable fabrics rated for outdoor use, or remove them entirely.
This is the real process for how to weatherproof indoor furniture for outdoor use, not just slapping a coat of spray on and hoping for the best.
—

Foto: Daniel Reche via Pexels
Cheap and Homemade Wood Sealer Options That Actually Work
Look, not everyone wants to spend $40 on a can of marine varnish for a quick porch project. I get it. Here are honest options at the lower end.
Linseed Oil + Mineral Spirits
This is the most effective cheap DIY wood sealant. Mix linseed oil with mineral spirits in roughly a 50/50 ratio for the first coat, which helps it penetrate deeply. Follow with straight linseed oil for coats 2 and 3.
It’s slow-drying (24-48 hours per coat), has a mild smell, and won’t last as long as varnish. But for old wooden furniture being repurposed for the garden, it works and costs very little.
Thompson’s WaterSeal
Thompson’s WaterSeal is an affordable outdoor sealant you’ll find at most hardware stores. It’s not the most durable option, plan to reapply every year or two, but it’s fast to apply and protects against rain and UV.
Good choice for wood furniture outside on a budget. Better than nothing, not as good as spar varnish.
Beeswax + Linseed Oil Paste
Some woodworkers swear by a homemade mix of beeswax melted into linseed oil. It creates a paste you rub into the wood and buff out. It conditions and repels water. It’s not a film-forming finish, so it won’t crack or peel, but it also doesn’t last as long.
For a spool table or garden stool that’s mostly decorative, this is a charming option.
What About WD-40 as a Wood Sealer?
I’ll be straight with you: WD-40 wood sealer is a popular internet suggestion that I don’t recommend for real weatherproofing.
WD-40 does repel water temporarily. But it’s a petroleum-based lubricant, not a wood finish. It breaks down fast under UV and heat, doesn’t bond to wood fibers, and can interfere with real sealants you try to apply later.
Use it in a pinch to stop water from getting into a crack overnight. Don’t rely on it as your actual DIY wood protection strategy.
Flood CWF-UV
Flood CWF-UV is a step up from Thompson’s, it’s a penetrating wood finish with UV blockers built in. Not a homemade solution, but it’s priced lower than marine varnish and offers solid wood water resistance for decks, furniture, and fences. It’s worth mentioning when budget matters but you still want real performance.
For a full weatherproofing approach that includes UV protection, mold resistance, and lasting water repellency in one system, this resource walks through exactly what to apply and in what order.
—
How to Maintain Weatherproofed Wood Furniture Over Time
Weatherproofing isn’t a one-and-done job. All finishes degrade, UV breaks them down, rain wears them away, and temperature cycles cause micro-cracking.
Annual Inspection Checklist
- Run your hand across the surface. If it feels rough or chalky, the finish is breaking down.
- Look for gray or dark patches, that’s UV damage or the start of mold.
- Check joints and corners. These fail first.
- Look for peeling or bubbling in film-forming finishes like varnish.
How to Refresh Without Starting Over
If the finish is just dull but not cracked or peeling, you can often get away with a light sanding (220-grit) and one good coat of the same product to restore protection.
If it’s cracking or peeling, you need to sand back to bare wood and start fresh. Don’t try to apply new varnish over a failing old coat, it will peel along with the old layer.
Seasonal Storage Tips
In climates with harsh winters, bring wood furniture inside or cover it with breathable furniture covers, not plastic tarps, which trap moisture. Protect from rain during the off-season even if the furniture is sealed. No finish lasts forever.
—

Foto: Ono Kosuki via Pexels
FAQ: How to Weatherproof DIY Wood Furniture
How many coats of sealant do I need to weatherproof wood furniture?
Most outdoor sealants and varnishes need at least 2 to 3 coats for real protection. Spar varnish and marine finish typically require 3 coats, with light sanding between each one. Oil finishes like teak oil may need 2 to 4 coats depending on how dry or porous the wood is.
Can I use indoor wood furniture outside if I seal it properly?
Yes, but with caveats. Dense hardwood like oak or teak converts well with a proper outdoor sealant or spar varnish. Softwoods or particleboard furniture won’t hold up long-term even with sealing. The wood itself has to be solid and dense enough to survive repeated moisture cycles.
How long does weatherproofing last on outdoor wood furniture?
It depends on the product and your climate. Epoxy coatings can last 5 or more years. Spar varnish lasts 2 to 3 years before it needs a refresh coat. Wood oils like teak oil or linseed oil need reapplication every 6 to 12 months in most climates.
Do I need to sand the wood before applying oil or sealant?
Yes, always. Sanding opens up the wood grain and removes any old finish, dirt, or mill glaze. Without light sanding first, oil and sealant sit on top of the surface instead of soaking in, which means they peel off far faster. Start with 80-grit and finish with 120 or 150-grit.
What is the difference between waterproofing and weatherproofing wood?
Waterproofing focuses on water resistance only, keeping moisture from penetrating the wood. Weatherproofing is broader and covers protection against rain, UV rays, temperature swings, and humidity. For outdoor use, you want weatherproofing, not just waterproofing.
Can I use a spray sealant instead of brush-on for wood furniture?
Yes, a waterproofing spray works great for smaller pieces, carved details, and furniture with tight corners. For large flat surfaces like tabletops, brush-on products give a thicker, more even coat. Many people use spray for the first coat and brush-on for follow-up coats.
Can I use WD-40 to seal wood?
WD-40 can temporarily repel water from wood, but it is not a real sealant. It doesn’t bond to the wood fibers, breaks down quickly in UV and heat, and can interfere with real sealants you apply later. It’s a short-term fix in a pinch, not a weatherproofing solution. If you’re serious about DIY wood protection, use an actual outdoor-rated product.
—
Want the complete step-by-step system without guessing which products to combine? This weatherproofing guide walks you through everything from prep to final coat, worth bookmarking before your next outdoor project.
📌 Enjoyed this content?
Mark diyfurnitureplans.com as your preferred source on Google and get more content like this directly in your searches.