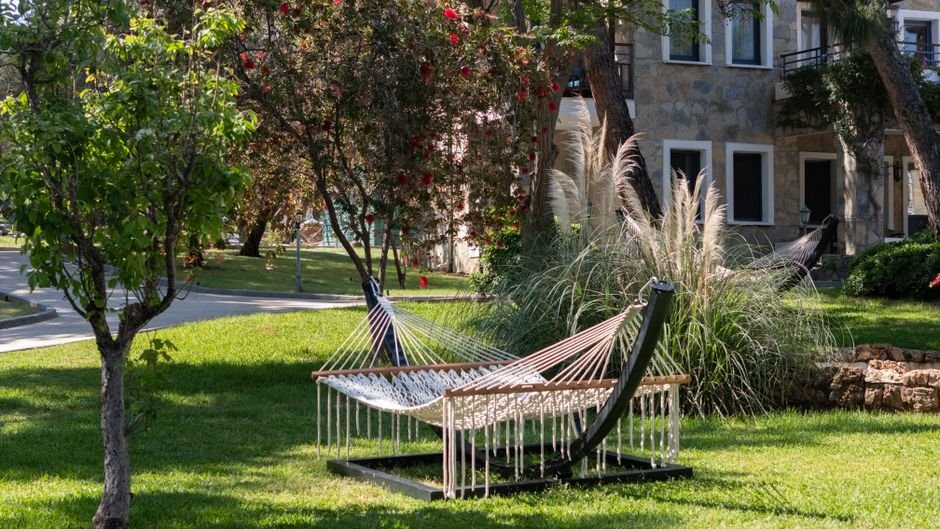
You’ve spent the last hour staring at your backyard, imagining a hammock swinging between two perfect trees, except those trees are either too far apart, too close together, or simply don’t exist. Good news: you don’t need trees. You need a plan.
The short answer is this: you can build a DIY hammock stand in a single weekend using basic lumber, a few bolts, and a drill. This guide gives you everything, the material list, the step-by-step instructions, the design options, and access to printable plans so you can start building today.
This article contains affiliate links. We may earn a commission on purchases made through them, at no extra cost to you.
✅ Quick Summary, What You’ll Find Here:
- The 4 most popular DIY hammock stand styles and which one fits your yard
- A full material list with wood sizes, quantities, and estimated costs
- Numbered step-by-step instructions to assemble the frame from scratch
- Where to find printable PDF plans with clear diagrams and exact measurements
- A direct comparison of wooden vs. metal stands so you know what to build
—
What You Need: Materials and Tools for a DIY Hammock Stand
Before you cut a single board, get your list together. Nothing kills a weekend project faster than a mid-build hardware store run.
Material List for a Standard A-Frame Hammock Stand (12-Foot Span)
This list covers the most popular build, a classic A-frame hammock stand designed to hold a standard 11-foot hammock.
| Material | Size | Quantity | Estimated Cost |
|---|---|---|---|
| Pressure-treated pine or cedar | 4×4 x 10 ft | 4 boards | $15, $25 each |
| 2×6 board (crossbar/runner) | 2×6 x 12 ft | 2 boards | $12, $18 each |
| Carriage bolts | 3/8″ x 4″ | 12 bolts | $8, $12 |
| Washers and nuts | 3/8″ | 24 sets | $6, $10 |
| Lag screws | 3/8″ x 3″ | 8 screws | $5, $8 |
| Eye bolts or hammock hooks | Heavy-duty | 2 | $6, $12 |
| Wood sealer / deck stain | Exterior grade | 1 qt | $10, $18 |
| Total Estimated Cost | $80, $130 |
You can trim that cost by shopping lumber sales or using reclaimed wood for non-structural pieces. But don’t cut corners on the 4×4 posts or the hardware, that’s what holds the weight.
Tools You’ll Need
- Circular saw or miter saw (to cut your boards to length)
- Power drill with bits sized for your bolt diameter
- Adjustable wrench or socket set
- Tape measure and carpenter’s square
- Pencil for marking cuts
- Sandpaper (80-grit and 120-grit)
- Safety glasses and work gloves
That’s it. No CNC router, no lathe, no advanced woodworking setup. This is genuinely an easy DIY project.
—
DIY Hammock Stand Using 4×4 Wood: The Best Approach
Should You Use 4×4 or 6×6 Posts?
This is the most common question beginners ask, and the answer depends on your use case.
4×4 posts are the standard choice for a homemade hammock stand designed for one or two adults. A properly assembled 4×4 stand with structural hardware can support 400-500 lbs. That’s more than enough for most household use.
6×6 posts are overkill for most backyard builds, but they make sense if:
- You’re building for heavy-duty or commercial use
- You’re designing a permanent structure in the ground
- You plan to use a wide, spreader-bar hammock that puts more lateral stress on the frame
For the average DIY build, 4×4 lumber is the right call. It’s lighter, cheaper, easier to work with, and still more than strong enough to support a hammock safely.
Selecting the Best Wood for an Outdoor Hammock Stand
Wood selection tips matter more for outdoor builds than for indoor furniture. Your stand will face rain, UV rays, humidity, and temperature changes every season.
Top picks for an outdoor hammock stand:
1. Cedar, Naturally rot-resistant, lightweight, and it looks great with a clear finish. Slightly more expensive but worth it if you want minimal maintenance.
2. Pressure-treated pine, The most affordable option. Widely available at any home center. Always seal cut ends, since the treatment doesn’t fully penetrate the wood’s core.
3. Redwood, Similar to cedar in durability, but harder to find and pricier. Great for a stylish and sturdy finished look.
Avoid standard untreated pine or spruce for outdoor use. They’ll warp and rot within a single season without serious protection.
—
Step-by-Step Instructions to Build Your Hammock Stand
This section walks you through building a freestanding hammock stand in the A-frame style, the most popular design for backyard use.
Step 1: Cut Your Boards to Length
Using your miter saw or circular saw:
- Cut (4) 4×4 posts to 7 feet each, these become your hammock stand posts
- Cut (2) 2×6 boards to 12 feet each, these are your hammock stand runners (the long horizontal pieces)
- Cut (4) 2×6 boards to 18 inches each, these become your feet (base stabilizers)
Mark each piece with a pencil before you cut. Measure twice, cut once, genuinely.
Step 2: Assemble the Frame (A-Frame Legs)
Take two 4×4 posts and angle them outward at roughly 10-15 degrees to form a V-shape when viewed from the end. This spread is what gives the A-frame its stability.
- Clamp the tops of the two posts together at the peak
- Drill pilot holes and run a carriage bolt through both posts at the top joint
- This top joint becomes your hanging point, use a heavy-duty eye bolt here instead of a standard carriage bolt
Repeat for the other end.
Step 3: Assemble Posts to Runners
Now assemble posts to runners by connecting your A-frame ends to the 12-foot 2×6 runners along the bottom.
- Lay the two A-frames upright, spaced 12 feet apart
- Position one runner on the inside of each leg pair, running the full length
- Drill through the runner and into the post, then bolt them together using 3/8″ carriage bolts with washers and nuts
- Tighten firmly, these joints carry the full weight load
Step 4: Add the Feet
To add the feet, attach the 18-inch 2×6 foot pieces horizontally at the base of each post set. These extend outward perpendicular to the runners, creating a wide, stable base that prevents the stand from tipping sideways.
- Drill pilot holes and use lag screws to attach each foot to its post
- Make sure feet are level, use shims if your ground isn’t perfectly flat
Step 5: Install End Braces
To install end braces, cut two diagonal brace pieces from leftover 2×6 material and attach them inside each A-frame to resist racking (side-to-side movement). A 45-degree brace from the leg to the runner on each end dramatically increases rigidity.
- Angle-cut the ends so they sit flush
- Bolt them in with two carriage bolts per end
Step 6: Add the Supports and Hanging Hardware
Add the supports by placing a 2×6 cross-piece at the peak of each A-frame if you want extra rigidity. Then install your eye bolts at both hanging points.
- Use a 3/8″ eye bolt rated for at least 600 lbs
- Thread it through the top peak bolt location, add a washer and nut on the back
- Hang your hammock chain or rope from these points
That’s your frame. Before you load it up, do a visual check, all bolts tight, no wobble, feet flat on the ground.
—

Foto: Quang Nguyen Vinh via Pexels
Free Printable Hammock Stand Plans (PDF Download)
Here’s where most free tutorials fall short. They give you the words but not the diagrams. And when you’re out in the yard with a saw in your hand, you need clear diagrams, not a wall of text.
Why Printable Plans Change Everything
Printable plans eliminate guesswork. A good woodworking plans PDF shows you:
- Exact cut angles for A-frame legs
- Labeled assembly diagrams for each joint
- Bolt placement measurements to the inch
- A material list you can take directly to the lumber yard
That’s the difference between a build that goes smoothly and one that eats your Saturday and sends you back to the hardware store twice.
If you want professional-grade hammock stand plans with step-by-step instructions, clear diagrams, and multiple design styles, including A-frame, curved, and hammock chair stand variants, these digital PDF plans are worth a look. They’re designed for home builders, not professional woodworkers, and they include CNC woodworking plans options if you have access to a CNC router.
Platforms Like Etsy and Woodbrew
You can also find individual hammock stand woodworking plans on Etsy, search “hammock stand plans printable” and you’ll find dozens of independent designers selling downloadable files for $5, $20 each. Woodbrew is another platform that lists community-contributed woodworking plans, including some free options.
The key thing to look for in any digital PDF plans purchase: make sure the file includes a cut list, a material list, and at least one exploded-view assembly diagram. If it’s just a rough sketch with dimensions, skip it.
—
The 4 Main DIY Hammock Stand Styles: Which One Should You Build?
Not every backyard is the same. Here’s a quick breakdown so you can pick the right design.
A-Frame Hammock Stand
The classic. Works for virtually any standard rope or fabric hammock. Easy to build this weekend, stores flat when disassembled, and handles most weather conditions well. Best for: backyards with open space.
Freestanding Hammock Stand (Straight-Leg)
Simpler than the A-frame, posts go straight up rather than angled. Requires wider feet for stability. Slightly easier to build but less naturally stable on uneven ground. Best for: flat decks or patios.
Curved DIY Hammock Stand
This is the most visually striking design. The curved frame wraps over the hammock in an arc, giving it a sculptural look. Curved DIY hammock stand plans CNC files are the easiest way to get accurate curves without a steam bender. Requires intermediate skill. Best for: front yards, garden focal points.
Hammock Chair Stand
A hammock chair stand is a single-post design with an overhead arm, perfect for a hanging chair or pod-style seat. It takes up a fraction of the footprint of an A-frame. Hammock chair stand plans printable are widely available and it’s one of the faster builds on this list. Best for: small patios, apartments with outdoor space.
—

Foto: Yan Krukau via Pexels
Wooden vs Metal Hammock Stand: Which Should You Build?
This question comes up constantly, and there’s actually a clear answer depending on what you value.
| Factor | Wooden Stand | Metal Stand |
|---|---|---|
| Cost | Lower (DIY: $80, $130) | Higher (store-bought: $100, $300) |
| Customization | Full, you design it | Limited to what’s sold |
| Look & Feel | Warm, natural, stylish | Industrial, utilitarian |
| Weight | Heavier | Lighter |
| Weather resistance | Needs sealing/maintenance | Powder coat can chip/rust |
| Weight capacity | 400-600 lbs (with 4×4) | Varies by product |
| Portability | Low, Medium | Higher (knock-down designs) |
| Lifespan (maintained) | 10-20+ years | 5-15 years |
| Skill required | Basic | None (assembly only) |
The verdict: If you want to build your own, wood wins on cost, look, and satisfaction. A wooden hammock stand that you built from scratch is also easier to repair, you replace one board, not an entire welded frame.
Metal makes sense if you want something truly portable or you’re not comfortable with any woodworking at all.
—
Tips for a Sturdy Freestanding Hammock Stand That Lasts
Building it is one thing. Making it last is another. Here’s what separates a stand you enjoy for a decade from one that falls apart in three seasons.
Finish and Seal Before You Hang Anything
Apply exterior-grade sealer or deck stain to every surface before the stand sees its first rainstorm. Pay extra attention to cut ends and bolt holes, those are the first places water gets in.
Two coats minimum. Let it dry fully between coats.
Reapply Every 1-2 Seasons
Even the best sealer breaks down. Check the wood each spring for gray discoloration or surface checking (small cracks). If you see either, sand lightly and reapply. This 30-minute task every spring can add years to your build.
Check Hardware Annually
Metal hardware can corrode even when the wood looks fine. Every season, check all bolts and eye bolts for rust, loosening, or deformation. Replace anything that looks questionable, hardware is cheap, hospital bills aren’t.
Store It or Cover It in Winter
If you live somewhere with hard winters, either disassemble the stand and store it in a garage, or cover it with a quality outdoor furniture cover. Freezing water that gets into bolt holes can crack even pressure-treated wood over time.
Use the Right Hanging Hardware
Your hanging point carries 100% of the weight. Use only eye bolts rated for at least 600 lbs, with a proper locking nut on the back. Never use cup hooks, S-hooks without closures, or undersized hardware at the attachment point.
—
Can a 4×4 Support a Hammock? (Direct Answer)
Yes, a 4×4 post made from structural lumber can easily support a hammock with two adults. The vertical compression strength of a 4×4 pine post is several thousand pounds. The real structural concern in a hammock stand isn’t compression, it’s the lateral force at the joints. That’s why bolt quality and joint design matter more than post size alone.
What About a Mexican Hammock?
A Mexican hammock is a hand-woven, net-style hammock made from cotton or nylon. They’re famously comfortable and they conform to your body differently than a fabric hammock. Because they gather at the ends and don’t use spreader bars, they work perfectly with any standard A-frame or hammock chair stand. No special stand required.
Two Trees in Your Backyard, Do You Still Need a Stand?
If you have two trees in your backyard that are 10-15 feet apart and at least 6 inches in diameter, you might not need a stand at all. Tree straps rated for hammock use are cheap and easy to install. But if your trees are the wrong distance, too young, or you want to move the hammock around, a freestanding hammock stand is the better long-term solution.
—
If you’re ready to skip the guesswork and start cutting wood this weekend, these ready-to-print hammock stand plans include multiple styles, A-frame, curved, and hammock chair, with exact measurements, exploded diagrams, and a full cut list for each design. They’re built for home builders, not professional woodworkers.
And if you’re someone who wants to build your own outdoor furniture beyond just a hammock stand, the same resource includes plans for benches, pergolas, and more. Good plans are a one-time investment that pays off every project.
—
Foto: Ahmet ÇÖTÜR via Pexels
FAQ: Hammock Stand Plans
How much does it cost to build a DIY hammock stand?
Most DIY hammock stand builds run $80, $130 in materials using pressure-treated pine or cedar. Cedar costs more but requires less maintenance. Buying quality digital PDF plans upfront is worth it, a single bad cut on expensive lumber costs more than the plans themselves.
What type of wood is best for an outdoor hammock stand?
Cedar and pressure-treated pine are the top choices for an outdoor hammock stand. Cedar is naturally rot-resistant and looks great with a clear finish. Pressure-treated pine is cheaper and widely available, just seal cut ends before assembly. Redwood is excellent but harder to find.
How long does it take to build a hammock stand from scratch?
A basic A-frame hammock stand or 4×4 wood freestanding design takes 4-6 hours for most beginners. More complex designs like a curved stand may take a full weekend. Having printable plans with clear diagrams before you start cuts that time significantly.
Can I build a hammock stand without advanced woodworking skills?
Absolutely. Most hammock stand plans are designed for beginners. If you can measure, mark, cut boards to length, and drive bolts, you have all the skills you need. The step-by-step instructions in this guide and in quality PDF plans make it accessible for first-time builders.
What is the weight limit for a wooden hammock stand?
A properly built stand using 4×4 posts and structural hardware typically supports 400-500 lbs. Using 6×6 posts and heavier hardware can push that higher. Always use rated eye bolts and carriage bolts at load-bearing joints, the bolts matter as much as the wood.
Do I need to treat or seal the wood for outdoor use?
Yes. Any outdoor hammock stand needs exterior-grade sealer or deck stain before its first rain exposure. Apply two coats, focusing on cut ends and bolt holes. Reapply every one to two seasons to keep the wood protected from moisture and UV damage.
What is a Mexican hammock?
A Mexican hammock is a hand-woven net-style hammock made from cotton or nylon threads, traditionally made in Mexico and Central America. They’re extremely comfortable and conform to the body’s shape. They work well with any standard A-frame hammock stand or hammock chair stand since they don’t require spreader bars.
What size hammock do I need for a 12-foot stand?
For a 12-foot freestanding hammock stand, a hammock with 9-11 feet of fabric length is ideal. A 10-foot fabric hammock is the most common pairing. The stand needs to be longer than the hammock to allow the proper sag, too short and the hammock hangs like a tightrope, which is uncomfortable and puts more stress on the hardware.
📌 Enjoyed this content?
Mark diyfurnitureplans.com as your preferred source on Google and get more content like this directly in your searches.