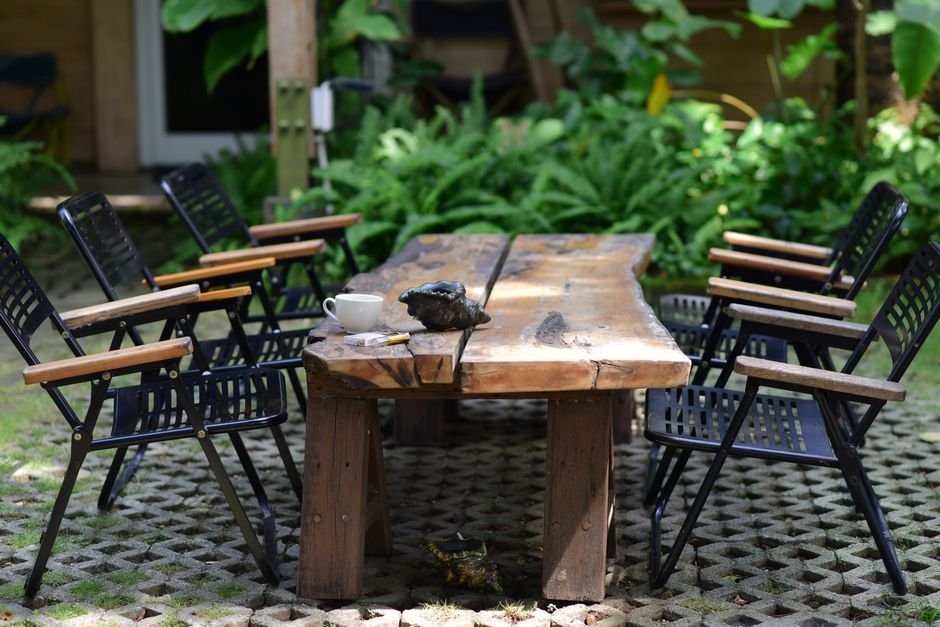
Here’s the short answer: you don’t need to spend $500 at a furniture store or hire a carpenter to get a solid outdoor dining table. With about $80, $150 in lumber, a free cut list, and a weekend, you can build a patio table that looks better than most things on the market, and lasts longer too.
I’ve built three of these. The first one was rough. The second one, pretty good. The third one, I almost cried a little when I set it outside. That’s the trajectory this guide puts you on.
This article contains affiliate links. We may earn a commission on purchases made through them, at no extra cost to you.
✅ Quick Summary, What You’ll Find Here:
- A complete cut list with exact dimensions you can print and take to the lumber yard
- Five free DIY outdoor table plans compared side by side (budget, farmhouse, modern, picnic, and large format)
- A step-by-step guide with real build notes for each stage
- A wood selection guide so you pick the right species for your climate
- Tips to keep your total cost under $150, or even under $100
—
Free DIY Patio Table Plans with Cut List (Quick Comparison)
Not all free DIY outdoor table plans are created equal. Some sites give you a pretty photo and three vague steps. That doesn’t help anyone. Below is a real comparison of five popular plan styles so you can pick the one that matches your skill level, budget, and backyard.
| Plan Style | Skill Level | Est. Cost | Build Time | Seats |
|---|---|---|---|---|
| Simple Plank-Top Patio Table | Beginner | $65, $90 | 4-6 hrs | 6 |
| Farmhouse Outdoor Dining Table | Intermediate | $120, $160 | 8-12 hrs | 8 |
| Modern Square Dining Table | Intermediate | $100, $140 | 6-10 hrs | 4 |
| Classic Picnic Table | Beginner | $55, $80 | 4-6 hrs | 6-8 |
| Large 10-Person Outdoor Table | Advanced | $180, $250 | 12-16 hrs | 10 |
Which Plan Should You Pick?
If this is your first build, go with the simple plank-top design. It uses basic 2×6 boards, straight cuts only, and pocket hole joinery with a Kreg Jig. You’ll be done in a Saturday.
If you want something that looks like it came from Pottery Barn but cost a fraction of the price, the farmhouse outdoor dining table plan is your target. It uses a trestle base and breadboard ends, nothing you can’t handle with a weekend of focus.
For a modern outdoor table aesthetic, the square dining table at 42 wide by 30 tall hits the sweet spot. Clean lines, no fuss, and it works on small patios or decks. This style pairs especially well with an outdoor dining set, matching benches or chairs built from the same lumber keep the whole look cohesive without spending extra.
The wheelchair accessible picnic table design is a variation of the classic picnic plan with one end left open and the tabletop extended, allowing a wheelchair to pull up flush. It’s a meaningful upgrade if you have family members or guests who need it.
—
Materials List and Tools You’ll Need
Before you touch a single board, get your materials list together. Walking into Home Depot or Lowe’s without a shopping list is how a $90 project turns into a $200 one.
Tools You’ll Need
- Miter saw (or circular saw with a guide)
- Drill/driver
- Kreg Jig (pocket hole jig), worth every penny
- Tape measure and speed square
- Random orbit sander
- Clamps (at least 4)
- Safety glasses and hearing protection
Optional but useful: a router for softening edges, and a jigsaw for any decorative cuts.
Standard Materials List (Simple Plank-Top, 6-Person Table)
| Material | Qty | Size | Est. Cost |
|---|---|---|---|
| 2×6 boards (tabletop) | 5 | 8 ft | $35, $45 |
| 2×4 boards (frame/apron) | 4 | 8 ft | $20, $28 |
| 4×4 posts (legs) | 1 | 8 ft (cut into 4 pieces) | $12, $18 |
| Pocket hole screws (1.5″) | 1 box | , | $8 |
| Exterior screws (3″) | 1 box | , | $10 |
| Wood glue (exterior grade) | 1 bottle | , | $6 |
| Exterior stain or sealer | 1 qt | , | $15, $22 |
Total estimated cost: $106, $137
You can cut this under $100 by using pressure-treated lumber throughout and skipping decorative edge routing. More on that below.
—
Cut List Breakdown: Exact Dimensions for Each Piece
This is the section most DIY articles skip, and it’s the one that matters most when you’re standing in the lumber aisle.
Here’s a complete, printable cut list for the standard 6-person outdoor dining table (72 long 38 wide 29.25 tall). These are finished dimensions after cutting.
Printable Cut List, Standard Patio Table (72″ x 38″ x 29.25″)
| Part | Qty | Thickness | Width | Length | Board Stock |
|---|---|---|---|---|---|
| Tabletop planks | 5 | 1.5″ | 5.5″ | 72″ | 2×6 x 8ft |
| Long apron (sides) | 2 | 1.5″ | 3.5″ | 65″ | 2×4 x 8ft |
| Short apron (ends) | 2 | 1.5″ | 3.5″ | 31″ | 2×4 x 8ft |
| Table legs | 4 | 3.5″ | 3.5″ | 28.5″ | 4×4 x 8ft |
| Diagonal braces | 2 | 1.5″ | 3.5″ | 24″ | 2×4 scraps |
⚠️ Note: Lumber dimensions are “nominal”, a 2×6 is actually 1.5″ x 5.5″ when you buy it. These numbers already account for that. Measure twice, cut once.
Cut List, Classic Picnic Table (72″ long, seats 6-8)
| Part | Qty | Thickness | Width | Length | Board Stock |
|---|---|---|---|---|---|
| Tabletop planks | 5 | 1.5″ | 5.5″ | 72″ | 2×6 x 8ft |
| Bench planks | 4 | 1.5″ | 5.5″ | 72″ | 2×6 x 8ft |
| Leg assemblies | 4 | 1.5″ | 5.5″ | 38″ (cut at angle) | 2×6 x 8ft |
| Top frame braces | 2 | 1.5″ | 3.5″ | 28″ | 2×4 x 8ft |
| Bench supports | 2 | 1.5″ | 3.5″ | 14″ | 2×4 scraps |
| Center brace | 1 | 1.5″ | 3.5″ | 28″ | 2×4 x 8ft |
A standard picnic table uses five to six 2×6 boards for the top, four 2x6s for the two benches, and 2x4s for all the framing and bracing. Total board count is usually 10 to 14 depending on bench length and your chosen plan.
—
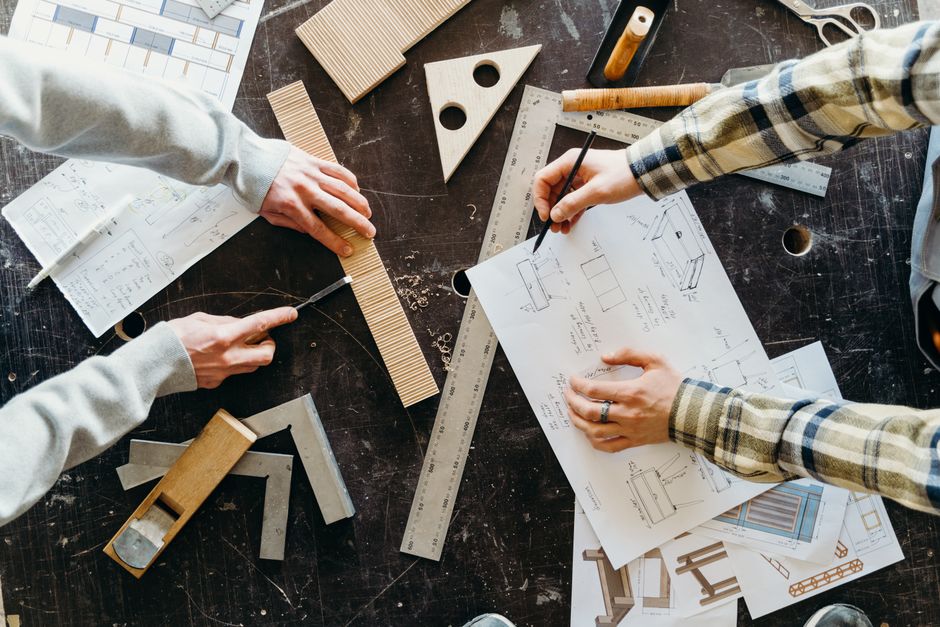
Foto: cottonbro studio via Pexels
Step-by-Step Building Instructions (With Real Build Notes)
Let’s build the standard plank-top patio table. It’s the best starting point because the cuts are simple, the joinery is forgiving, and the result looks genuinely great outside. Think of this as your complete easy to follow instructions for a DIY wood table build, no assumptions about what you already know, no steps glossed over.
Step 1, Cut All Your Pieces First
Don’t start assembling and then cut as you go. Cut everything from your cut list before you touch the drill. Label each piece with painter’s tape and a marker.
This took me about 45 minutes with a miter saw. Go slow on your first cut and check it against the measurement before cutting the rest.
Step 2, Build the Leg Assemblies
Take your four 4×4 legs and attach one short apron piece across the top of each pair. Use pocket hole joinery, drill two pocket holes in each end of the apron, apply a thin bead of exterior wood glue, clamp, and drive the screws.
The table legs and frame are the backbone of the whole build. Get these right and everything else falls into place. This step creates two “H” shaped end frames. Let the glue set for 20 minutes before moving on.
Step 3, Attach the Long Aprons
Stand the two H-frames up and connect them with the two long apron pieces. Again, pocket holes and exterior screws. Check that the whole frame is square by measuring corner to corner, both diagonal measurements should match.
If they don’t match, nudge the frame gently until they do, then clamp and fasten.
Step 4, Add Diagonal Bracing (Optional but Recommended)
Cut two diagonal braces from 2×4 scraps. Angle both ends at 45 degrees and tuck them inside the frame, one per long side. Drill and screw into place. This eliminates wobble and adds years to the table’s life.
Step 5, Attach the Tabletop Planks
Lay your five 2×6 tabletop boards face-down on a flat surface. Space them evenly, a 1/8″ gap between boards using a small scrap as a spacer helps with drainage and wood movement.
Flip the frame upside down onto the planks, center it, and drive 3″ exterior screws up through the aprons into the boards. Two screws per board end, countersunk slightly.
Step 6, Sand the Whole Table
Start with 80-grit sandpaper to knock down any rough spots, then move to 120-grit for a smooth finish. Pay attention to the top surface and any edges your hands will touch. A random orbit sander makes this fast.
Sanding and finishing outdoor wood is where most beginners rush, don’t. The smoother the surface, the better the finish sticks.
Step 7, Apply Exterior Finish
Apply your chosen exterior stain, sealer, or paint. Minwax makes a solid line of exterior stains that penetrate the wood and protect it from UV and moisture. Two coats is the minimum, three if you’re in a wet climate.
Let each coat dry fully before applying the next. Flip the table and coat the underside too, that’s where moisture sneaks in.
Step 8, Flip, Set, Enjoy
Flip the table right-side up, set it on your patio or deck, and spend exactly 30 seconds just looking at what you built. You earned it.
If you want a full visual walkthrough with 3D renderings and dimensions for more advanced designs, this complete plans resource covers everything from farmhouse trestle tables to modern steel-leg builds, all with free printable PDFs.
—
Best Wood for an Outdoor Patio Table
This comes up constantly, and the answer depends on your budget and how much maintenance you want to do.
Wood Species Comparison for Outdoor Use
| Wood | Rot Resistance | Cost | Availability | Maintenance |
|---|---|---|---|---|
| Cedar wood outdoor table | Excellent | Mid ($$$) | Wide | Low |
| Redwood | Excellent | High ($$$$) | West Coast mainly | Low |
| Pressure-Treated Pine | Good (chemical) | Low ($) | Everywhere | Medium |
| Douglas Fir | Moderate | Low-Mid ($$) | Wide | Medium-High |
| Teak | Outstanding | Very High ($$$$$) | Specialty | Very Low |
My Honest Recommendation
Cedar is the sweet spot for most people. It’s naturally rot-resistant, it smells great when you cut it, it’s lightweight, and it takes stain beautifully. You’ll find it at most lumberyards and at Home Depot or Lowe’s without special ordering.
Pressure-treated lumber is the budget king. It resists rot because it’s chemically treated, not because of the wood’s natural properties. It’s heavier and can be harder to work with, but it works well for DIY outdoor furniture when properly sealed. When you’re specifically choosing treated lumber outdoor use, let it dry for a few weeks before finishing, fresh pressure-treated wood holds moisture that prevents stain from penetrating evenly.
Redwood is gorgeous but regional. If you’re on the West Coast, it’s more accessible and worth considering. Everywhere else, you’re paying a premium for shipping.
Avoid untreated pine, poplar, or oak for outdoor use. They’ll look great for one season and then start going gray, cracking, and pulling apart at the joints.
—

Foto: Ono Kosuki via Pexels
How to Build a Patio Table on a Budget (Under $150)
Let’s talk numbers honestly, because “budget build” means different things to different people.
How to Make an Inexpensive Outdoor Table
Here’s where the real savings come from:
1. Use pressure-treated pine, it’s the least expensive structural lumber at most stores and holds up outdoors with proper sealing.
2. Skip the 4×4 legs, taper-cut 2x4s screwed together in an L-shape work almost as well and cost less.
3. Keep the design simple, no trestle base, no breadboard ends, no decorative router work. Straight cuts only.
4. Buy in standard lengths, plan your cut list around 8-foot boards to minimize waste. Offcuts from one piece become braces or spacers.
5. Use one coat of a quality exterior sealer, a $15 quart of penetrating oil finish goes a long way.
Real Cost Breakdown for a Budget Build
| Item | Cost |
|---|---|
| 5x 2x6x8 PT pine (tabletop) | $30, $40 |
| 4x 2x4x8 PT pine (frame) | $16, $22 |
| 1x 4x4x8 (legs, cut into 4) | $10, $14 |
| Hardware (screws, pocket screws) | $14, $18 |
| Exterior sealer (1 qt) | $12, $18 |
| Total | $82, $112 |
You can legitimately build a patio table for under $100 if you already own sandpaper and clamps. If you need to buy those too, budget $110, $130 for your first build.
—
Printable Plans PDF, Free Download
Can you provide free plans for outdoor tables in PDF format? Yes, and here’s how to get them without jumping through hoops.
The cut list tables above are designed to be printed directly from this page. Select them, right-click, and print, or use your browser’s print function and select “print selection.” They’ll format cleanly on a standard 8.5 x 11 sheet.
For full printable outdoor dining table plans with 3D rendering with dimensions, assembly diagrams, and shopping list breakdowns, Ana White and Shanty 2 Chic both offer free downloads on their sites, no email signup required on most plans. Ana White’s farmhouse table plan is particularly well-documented with real build photos at every stage.
If you want building steps that go beyond the basics, including advanced joinery, modern designs with steel accents, and 10-person outdoor table layouts, this resource has a full library of printable plans worth bookmarking before you head to the store.
DIY Outdoor Tabletop Ideas Worth Considering
- Herringbone top: lay 2x4s at 45-degree angles for a high-end look, same cost
- Tile inset: build a wood frame and set concrete tile in the center for easy cleaning
- Live-edge slab top: source a single slab locally and build legs around it, looks expensive, can be affordable if you find a deal
- Cedar plank with black metal legs: the most popular modern outdoor look in 2026, and surprisingly easy with hairpin or pipe legs
—

Foto: RDNE Stock project via Pexels
More Free Outdoor Table Plans to Explore
Once you’ve built one, you’ll want to build more. Here are five free project plans worth exploring next.
1. Farmhouse Patio Table Plans, Free Cut List
The farmhouse table style uses a trestle base with X-legs or turned legs, a thick plank top, and breadboard ends that keep the tabletop flat over time. It’s the plan most people pull up when they search “Pottery Barn look”, and for good reason. It costs about $120 to $160 in lumber and seats 8 comfortably.
Dimensions: Typically 84″ long x 40″ wide x 30″ tall. Seats 8.
2. Modern Square Outdoor Dining Table Plans
A square dining table at 42 wide by 30 tall works perfectly on a smaller patio. The top uses a tight-laid 2×4 or 2×6 grid and the legs are either 4×4 posts or metal hairpin legs bolted on. Total build time: 6 to 8 hours.
3. Wheelchair Accessible Picnic Table Plan
The wheelchair accessible picnic table removes one bench end and extends the tabletop 12 to 18 inches on that side, letting a wheelchair pull flush to the table. Standard picnic table framing applies everywhere else, it’s a simple modification with a big impact.
4. Classic 6-Foot Picnic Table
The classic picnic table never goes out of style. Five to six 2×6 boards on top, 2×6 bench planks, and a cross-leg assembly with a center brace. You can do this build with basic hand tools if needed. Total cost: $55, $80.
5. Large 10-Person Outdoor Table
This one takes more material and more time, expect 10 to 14 hours across two weekends. But a table that seats 10 with clean joinery and a solid finish is something you’d pay $800 for at a store. The lumber dimensions get larger here: a 96″ or 108″ top with doubled aprons and six legs for proper support.
For any of these builds, having plans with actual 3D rendering with dimensions makes a huge difference in understanding how pieces fit before you start cutting. Check this full plans library for detailed PDF versions of each style.
—
FAQ, DIY Patio Table Plans
What exact measurements do I need for a standard patio dining table?
A standard outdoor dining table runs 72 long 38 wide 29.25 tall, that’s the sweet spot for seating 6 comfortably with chairs. For a 4-person square table, 42 wide by 30 tall is the standard. Always verify your patio dimensions before committing to a size.
What tools do I need to build a patio table from scratch?
You need a miter saw or circular saw, a drill/driver, a Kreg Jig for pocket holes, a tape measure, speed square, and a sander. That’s it for a basic build. A table saw helps if you’re ripping boards, and a router adds polish, but neither is required for beginner woodworking.
How long does it take to build a DIY patio table as a beginner?
Most beginners finish a simple plank-top table in 6 to 10 hours of actual build time. That’s a solid Saturday, plus a few hours Sunday for finishing. More detailed farmhouse or trestle designs run 12 to 16 hours across two weekends, not counting stain drying time.
How do I protect my outdoor wood table from weather damage?
Use an exterior-grade finish. Minwax Helmsman Spar Urethane is a popular choice, it’s waterproof, UV-resistant, and holds up well in most climates. Apply two to three coats, sanding lightly with 220-grit between coats. Reapply every one to two years depending on sun and rain exposure.
Can I build a patio table for under $100?
Yes. Using pressure-treated lumber from Home Depot or Lowe’s, a simple plank top design, and basic pocket hole fasteners, most builds land between $82 and $112. If you already have tools and hardware on hand, a clean $90 build is realistic.
Where can I download a free printable cut list for a patio table?
Print the cut list tables directly from this page, they’re formatted for standard paper. For full PDF plans with assembly diagrams and 3D rendering with dimensions, Ana White and Shanty 2 Chic offer free downloads. For a broader library of advanced plans, see the resource linked in the Printable Plans section above.
What is a good wood to use for an outdoor table?
Cedar is the most practical choice for most regions, it resists rot naturally, takes stain well, and is widely available. Pressure-treated pine is your best budget option. Redwood is excellent but pricier and harder to source outside the West Coast. Avoid untreated softwoods like standard pine or poplar for outdoor use.
How many 2x6s does it take to build a picnic table?
A standard 6-foot picnic table uses five to six 2×6 boards for the top, four 2×6 boards for the two benches, and 2×4 boards for framing and the center brace. Total board count is typically 10 to 14, depending on the specific plan and bench configuration.
📌 Enjoyed this content?
Mark diyfurnitureplans.com as your preferred source on Google and get more content like this directly in your searches.