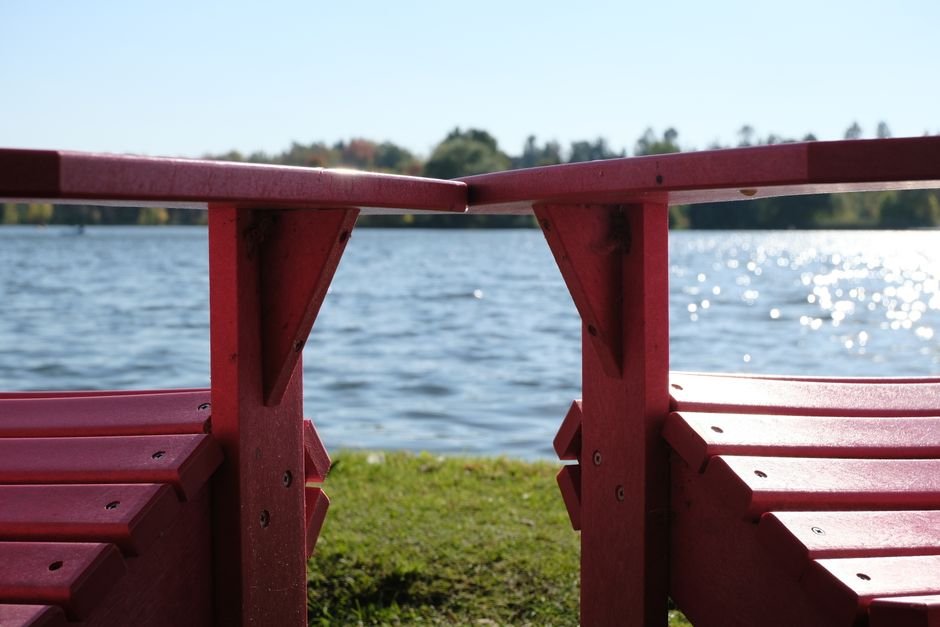
You can build a beautiful, solid Adirondack chair from scratch using nothing but basic tools, a few boards of 2×4 lumber or 2×6 lumber, and a free plan you can download today. The chair takes one weekend. It costs between $30 and $100 in materials depending on the wood you pick. And the result? A classic outdoor chair that lasts for years.
This article contains affiliate links. We may earn a commission on purchases made through them, at no extra cost to you.
That’s the short version. But if you want to actually build one, without wasted cuts, crooked seats, or a chair that wobbles the first time you sit in it, you need a few more details. I’m going to give you all of them.
Quick Summary:
✅ Free Adirondack chair plans are available from trusted sources like Ana White, Family Handyman, and Instructables
✅ The best wood choices are cedar boards for outdoors or pine lumber for budget builds
✅ You need roughly 8 to 10 2×4 lumber or 2×6 boards and basic hardware
✅ A beginner with a drill and a circular saw can finish this easy to build project in a weekend
✅ A complete Adirondack chair plans PDF with cut list and diagrams is linked in this article
—
Free Adirondack Chair Plans: Our Top Picks
Not all free plans are created equal. Some give you a sketch and wish you luck. Others give you actual diagrams, exact measurements, a cut list, and color photos of each step. Here are the ones worth your time.
Ana White’s Free Adirondack Chair Plan
Ana White is probably the most trusted name in free DIY furniture plans online. Her Adirondack chair plans PDF is clean, well-organized, and designed for beginner woodworking. She uses primarily 2×4 lumber, which is cheap and easy to find at any home center.
Her plan includes a full cut list, assembly diagram, and step-by-step photos. The skill level is rated beginner. Estimated build time is about 6 hours. This is where I’d send any first-timer.
Family Handyman’s Classic Adirondack Design
Family Handyman publishes one of the most detailed free plans available. Their version of the classic Adirondack design includes precise angle cuts, a full project plan with measurements, and tips for sanding and finishing. The instructions are written for someone who’s done a little woodworking but not a lot.
The design is slightly wider than Ana White’s, about 30 inches across the seat, which makes it more comfortable for taller adults.
Instructables Community Plans
Instructables has dozens of free woodworking plans for Adirondack chairs submitted by real builders. The quality varies, but the top-rated ones are excellent. You get color photos of every step, community comments with fixes for common mistakes, and sometimes printable templates for curved cuts.
The skill level on most Instructables versions is beginner to intermediate. Great if you want to see real-world builds with imperfect cuts and how people worked around them.
The Spruce Crafts and WOOD Magazine
The Spruce Crafts offers a clean, printable plan with good diagrams. WOOD Magazine goes deeper, their plans are closer to professional woodworking plans and include more detail on joinery and finishing. Both are free to access online.
Comparative Table: Free Adirondack Chair Plans at a Glance
| Plan Source | Skill Level | Est. Cost | Build Time | Wood Type | PDF Available |
|---|---|---|---|---|---|
| Ana White | Beginner | $40, $60 | 6 hrs | 2×4 pine | Yes |
| Family Handyman | Beginner, Int. | $50, $80 | 7-8 hrs | 2×4/2×6 | Yes |
| Instructables | Beginner, Int. | $35, $70 | 6-9 hrs | Pine/cedar | Varies |
| The Spruce Crafts | Beginner | $40, $65 | 5-7 hrs | Pine | Yes |
| WOOD Magazine | Intermediate | $60, $100 | 8-10 hrs | Cedar/pine | Yes |
If you want a single, complete free Adirondack chair plans PDF that combines a cut list, diagrams, and a full materials list in one place, check out this resource here, it’s worth bookmarking before you head to the lumber yard.
—
Materials List: What Wood and Hardware You Need
Let’s talk about what you’re actually buying. This is where a lot of people overspend or underbuy.
Best Wood for an Adirondack Chair
The “People Also Ask” question here is real: what is the best wood to use for an Adirondack chair?
Cedar boards are the gold standard for outdoor furniture. Cedar naturally resists rot, repels insects, and handles moisture without warping badly. It’s lightweight too, which matters when you’re moving the chair around your deck or patio.
Pine lumber is the budget choice. It works fine if you seal it properly, more on that in the finishing section. Untreated pine outdoors will rot within a few seasons, so don’t skip the waterproofing step.
Teak and redwood are excellent but expensive. For most backyard builders, cedar or treated pine is the smart call.
How Many 2x4s Do You Need?
People always ask this. The honest answer: about 8 to 10 2×4 lumber boards at 8 feet long, depending on the design. Some plans call for a mix of 2x4s and 2x6s for the seat and back.
Here’s a general breakdown for a standard plan:
- Seat slats: 5 pieces of 2×4 at 21 inches long
- Back slats: 7 pieces of 2×4 (graduated lengths from 24 to 36 inches)
- Front legs: 2 pieces of 2×4 at 21 inches
- Back legs: 2 pieces from 2×6 lumber (curved, cut with a jigsaw)
- Arm rests: 2 pieces of 2×4 at 28 inches
- Back support rails: 2 pieces of 2×4 at 30 inches
Total: roughly 8 to 10 eight-foot boards.
Hardware You’ll Need
- Deck screws: 1-5/8 inch and 2-1/2 inch sizes, at least 100 screws total
- Waterproof wood glue: not regular PVA, use a proper waterproof wood glue rated for outdoor use (Titebond III is a good choice)
- Wood plugs or exterior wood filler for screw holes (optional but looks cleaner)
- Sandpaper: 80-grit, 120-grit, and 220-grit
Total materials cost: $35 to $60 for pine, $60 to $100 for cedar.
—
Tools Required to Build an Adirondack Chair
Here’s the good news: you don’t need a full shop. This is a genuine beginner woodworking project.
Essential Tools
- Circular saw or miter saw, for straight crosscuts on your boards
- Jigsaw, for the curved cuts on the back legs and the top of the back slats
- Power drill with a Phillips bit and a countersink bit
- Tape measure and pencil
- Clamps (at least 4)
- Random orbital sander or sanding block
Optional but Helpful
- Kreg Jig, makes pocket-hole joinery fast and clean, great for attaching arm rests and seat supports without visible screws
- Miter saw, speeds up repetitive cuts significantly
- Brad nailer, helpful for tacking pieces in place before screwing
A note from builders on Reddit r/woodworking: the jigsaw is the one tool beginners underestimate. The curved back leg cuts define the look of the chair. Take your time, use a sharp blade, and follow your line. A wobbly cut there throws off the whole feel of the finished piece.
Can you build an Adirondack chair with basic tools? Yes, a circular saw, a jigsaw, and a drill are genuinely all you need. Norm Abram from The New Yankee Workshop built his reputation on the idea that good technique matters more than expensive tools. That’s still true.
—

Foto: Rob Sarte via Pexels
Step-by-Step Instructions to Build Your Adirondack Chair
Are Adirondack chairs hard to build? No. Here’s the proof.
If you’ve been wondering how to make an Adirondack chair without a lot of experience or expensive equipment, this section answers that question start to finish. Follow these steps in order and you’ll have a finished chair by the end of the weekend.
Step 1: Cut All Your Pieces First (Don’t Skip This)
Before you pick up a screw, cut every single piece from your cut list. Label each piece with tape and a marker. This sounds obvious, but assembling mid-cut is how mistakes happen.
Use your miter saw or circular saw for straight cuts. Switch to the jigsaw cuts for the back legs, those are the pieces that curve backward and give the chair its signature reclined look. Print your template, trace it onto the board, and cut slowly.
⚠️ Safety tip: Always clamp your workpiece before cutting. Never hold it with your hand. One slip with a jigsaw blade is not worth the shortcut.
Step 2: Assemble the Seat
The seat slats run horizontally across the front. Space them about 1/4 inch apart using a spare nail as a spacer, this lets water drain and the wood breathe.
Assemble the seat by attaching slats to two side support rails with deck screws and a dab of waterproof wood glue at each joint. Pre-drill your holes to prevent splitting. Countersink the screws so the heads sit flush.
The seat frame should measure about 21 inches deep by 24 inches wide at this stage.
Step 3: Attach the Back Legs
The back legs are the most complex part of this build. They’re angled backward, the back of an Adirondack chair sits at roughly 100 to 110 degrees from the ground, which is what makes it so comfortable to recline in.
Attach legs to the outside edges of the seat frame using 2-1/2 inch deck screws and wood glue. Use clamps to hold everything square while the glue sets. Check with a square before driving the final screws.
Step 4: Attach the Front Legs
The front legs attach to the front corners of the seat frame. They should be vertical, no angle here. The standard height puts the seat about 14 to 15 inches off the ground.
Pre-drill, countersink, and screw through the seat frame into the top of each front leg. Two screws per leg minimum, three is better.
Step 5: Build and Attach the Back Slats
The back slats fan out slightly at the top, that’s the classic look. Cut them to graduated lengths if your plan calls for it (the center slat is longest, outer slats get shorter).
Attach back slats to two horizontal back support rails with screws and wood glue. Space them evenly, about 1/4 inch apart. Then tilt the whole back assembly to your angle and screw it into the back legs.
✅ Pro tip: Some builders pre-assemble the entire back as a panel, then attach it to the legs as one unit. This is cleaner and easier to square up than attaching slats one at a time.
Step 6: Add the Arm Rests
The arm rests sit on top of the front legs and rest against the back leg on each side. They extend forward about 4 inches past the front legs, enough to actually rest your arm.
Most plans cut the front of the arm rest at a slight curve or angle. This is another jigsaw cuts moment. Go slow, follow the line.
Attach arm rests with screws driven down through the arm into the front leg, and a screw (or two) driven horizontally into the back leg. Clamp while the glue sets.
Step 7: Final Sanding
Sand everything with 80-grit first to knock down rough spots. Then 120-grit for smoothness. Finish with 220-grit if you want a silky result before staining.
Pay attention to any exposed edges or end grain, those areas absorb the most water and need the smoothest surface for the finish to bond properly.
—
Cut List and Diagrams
This is the section most free plans skip or bury. Here’s a complete, usable cut list for a standard Adirondack chair built from 2×4 lumber.
Standard 2×4 Adirondack Chair Cut List
| Part | Qty | Size (Thickness x Width x Length) | Notes |
|---|---|---|---|
| Back legs | 2 | 1.5″ x 5.5″ x 38″ | Curved, use jigsaw |
| Front legs | 2 | 1.5″ x 3.5″ x 21″ | Straight cuts |
| Seat slats | 5 | 1.5″ x 3.5″ x 21″ | Evenly spaced |
| Seat support rails | 2 | 1.5″ x 3.5″ x 18″ | Angle cut at front |
| Back slats | 7 | 1.5″ x 3.5″ x 24″, 36″ | Graduated lengths |
| Back support rails | 2 | 1.5″ x 3.5″ x 21″ | Horizontal |
| Arm rests | 2 | 1.5″ x 5.5″ x 28″ | Front curve optional |
| Front arm support | 2 | 1.5″ x 3.5″ x 5″ | Between arm and front leg |
Chair Dimensions
- Seat width: 24 inches (standard)
- Seat depth: 20-21 inches
- Overall height: 36-38 inches
- Arm height: 25-26 inches from ground
- Back angle: 100-110 degrees from ground
- How wide should an Adirondack chair be? Standard is 29-30 inches overall width including arm rests. Wide versions go to 33-35 inches.
- Standard size of an Adirondack chair: 29″W x 33″D x 37″H is the most common spec you’ll find across plans.
For a printable version of this cut list with a full diagram, download the complete Adirondack chair plans PDF here. It’s free and includes visual templates for the curved cuts.
—

Foto: Karen F via Pexels
Finishing Tips: Paint, Stain, and Waterproofing
You built the chair. Now protect it, because an unfinished outdoor chair will look like driftwood by next summer.
Sanding and Finishing Before You Apply Anything
Always sand before finishing. Start at 80-grit, work up to 150 or 220-grit. Wipe down with a tack cloth or a damp rag to remove all dust. Don’t skip this step, finish sticks poorly to dusty surfaces.
How do you waterproof a wooden Adirondack chair? There are three main approaches:
1. Exterior paint, the most protective option. Blocks UV, moisture, and mildew. Two coats minimum. Popular for pine chairs.
2. Wood stain + sealer, shows the natural grain. Minwax makes outdoor stains that look great on cedar. Apply one coat, let dry 24 hours, apply a second.
3. Clear waterproof sealer, Thompson’s WaterSeal is the go-to name here. It’s a penetrating sealer that soaks into the wood fibers and repels water without changing the color much. Great for cedar that you want to keep looking natural.
My Honest Recommendation on Finish
For a cedar boards chair: use a penetrating oil finish or a teak oil. It feeds the wood, enhances the color, and holds up well season after season. Reapply once a year.
For pine lumber: paint it. Pine doesn’t have cedar’s natural oils, so it needs a film-forming finish to stay protected. A good exterior primer plus two coats of exterior paint and you’re set for 4 to 5 years before needing a touch-up.
Builders on communities like Rockler Woodworking and Popular Woodworking forums consistently recommend Minwax Helmsman Spar Urethane as a top pick for chairs that sit in direct sun, it flexes as the wood expands and contracts, so it doesn’t crack.
Steve Shanesy, longtime editor of Popular Woodworking, has written extensively about how the finish coat is what separates a five-year outdoor project from a twenty-year one. Don’t rush it.
—
Adirondack Chair Variations Worth Building
Once you understand the basic build, variations become simple to tackle.
Folding Adirondack Chair Plans Free
The folding Adirondack chair plans free version adds pivot hardware at two joints, where the back leg meets the seat, and where the front arm support meets the frame. It takes about 30% more time to build but stores flat in a garage. Ana White and several Instructables contributors have published solid folding versions.
Adirondack Chair with Ottoman (Footrest)
An ottoman is essentially a small angled footrest using the same slat-and-frame construction. It connects to the front legs of the chair with short brackets. Add it to your project plan and you’re looking at maybe 2 extra hours of work. Totally worth it.
Kids’ Size Adirondack Chair
Scale everything down by about 35%. The back angle stays the same, kids love the recline just as much as adults. The Spruce Crafts has a good free kids’ version that fits ages 3 to 8.
Adirondack Chair Woodworking Plans Cedar, Classic Outdoor Version
If you’re building with cedar boards and want that timeless, natural look, skip paint entirely. Let the cedar gray naturally over time, or apply a UV-blocking oil to keep the warm honey color. This is the version I’d pick for a permanent patio setup.
—

Foto: Karen F via Pexels
Common Mistakes to Avoid When Building an Adirondack Chair
I’ve seen these errors in forum posts, YouTube comments, and yes, on my own early builds. Learn from them.
1. Not pre-drilling screw holes. Cedar and pine both split if you drive a screw near the edge without a pilot hole first. Pre-drill every single hole. It takes 10 extra seconds and saves your board.
2. Skipping the countersink bit. Screw heads that sit proud of the wood surface will snag clothing, collect water, and rust. A countersink bit costs a few dollars and makes the job look professional.
3. Cutting all back slats the same length. The graduated back slat lengths are what give the classic Adirondack design its fan shape. If your plan calls for graduated lengths, cut them that way. Same-length slats look flat and wrong.
4. Using regular wood glue on outdoor furniture. Standard PVA glue dissolves in moisture. Use waterproof wood glue, Titebond III or equivalent, for every joint that will live outside.
5. Rushing the back leg angle. The back leg determines the recline angle of the entire chair. If it’s off, every part attached to it is off. Measure twice, cut once, this is the one place where that phrase actually matters on this build.
6. Skipping finish coats. Unfinished outdoor wood doesn’t just look bad, it rots. Apply your finish within 24 hours of completing the build.
—
Free Adirondack Chair Plans PDF Download
Let’s make this easy. You’ve read the full guide. You have your cut list. Now you need a clean, printable plan you can take to the garage.
What makes these outdoor furniture plans so useful is the simple design, straight cuts for most pieces, minimal hardware, and no complicated joinery. Whether you’re building your first chair or your fifth, a simple design like this one is forgiving enough for beginners but satisfying enough for experienced builders. Grab your free PDF download and you’ll have cut lists, visual diagrams, and step-by-step instructions all formatted for printing, ready to follow right at the workbench.
Click here to access the free Adirondack chair plans PDF download, it includes the full cut list, visual diagrams, and step-by-step instructions formatted for printing.
This is the resource I recommend bookmarking before your next trip to the lumber yard. Having the plan on your phone or printed out while you’re cutting saves a lot of back-and-forth.
—
FAQ: DIY Adirondack Chair Plans Free
What type of wood is best for building an Adirondack chair?
Cedar is the best choice for an outdoor Adirondack chair. It naturally resists rot, repels insects, and handles weather without warping badly. Pine lumber is a solid budget alternative, just make sure to seal and paint it properly. Teak and redwood also work great outdoors but cost significantly more.
How long does it take to build a DIY Adirondack chair?
Most beginners finish in one full weekend, roughly 6 to 10 hours total including cutting, assembling, sanding and finishing, and applying a first coat. Experienced woodworkers with a miter saw set up can finish in 4 to 5 hours.
Do I need advanced woodworking skills to build an Adirondack chair?
No. This is one of the most recommended beginner woodworking projects for exactly this reason. The cuts are mostly straight. Assembly uses screws and wood glue. The tolerances are forgiving. If you can operate a circular saw and a drill, you can build one.
What tools do I need to build an Adirondack chair from scratch?
You need a circular saw or miter saw, a jigsaw for curved cuts, a power drill, clamps, a sander, a tape measure, and a pencil. A Kreg Jig is optional but speeds up joinery significantly. You don’t need a router, a planer, or any expensive shop tools.
How much does it cost to build an Adirondack chair yourself?
Building with pine lumber typically runs $30 to $60 in materials. Using cedar boards brings the total to $60 to $100 depending on your local lumber prices. Either way, you’re saving significantly compared to buying a finished chair at a furniture or garden store.
Where can I download a free Adirondack chair plan PDF?
Sites like Ana White, Family Handyman, Instructables, and The Spruce Crafts all offer free Adirondack chair plans PDF downloads with diagrams and cut lists. You can also download a complete plan directly through this link, formatted for printing and ready to take to the shop.
📌 Enjoyed this content?
Mark diyfurnitureplans.com as your preferred source on Google and get more content like this directly in your searches.
Leave a Reply