You can build a solid, attractive DIY garden bench in a single afternoon for under $60, no experience required. This step-by-step guide covers everything: a full shopping list, exact cut list with dimensions, a tools section (spoiler: you only need 3), and even a version with a back. Whether you’re a complete beginner or a weekend woodworker looking to get into DIY furniture, you’ll have a sturdy bench sitting in your backyard by sundown.
This article contains affiliate links. We may earn a commission on purchases made through them, at no extra cost to you.
Here’s a quick summary of what you’ll find below:
✅ Full materials list with estimated costs under $60
✅ Exact cut list, every board dimension spelled out
✅ Only 3 tools needed to complete this project
✅ Step-by-step numbered instructions for the full build process
✅ A second variation: how to build a garden bench with a back
—
Materials List and Shopping List (Total Cost Under $60)
Let’s talk money first. One of the biggest reasons people hesitate to build outdoor furniture is assuming it’ll cost a fortune. It won’t.
This project uses 2×4 lumber, the most common, cheapest dimensional wood you’ll find at Home Depot or Lowe’s. For an inexpensive bench with no back, you’ll need:
Simple Garden Bench Shopping List
| Material | Qty | Est. Cost (each) | Total |
|---|---|---|---|
| 2×4 x 8ft pressure-treated pine | 5 | ~$6.50 | ~$32.50 |
| 3-inch exterior screws (box) | 1 | ~$8.00 | ~$8.00 |
| 1.5-inch exterior screws (box) | 1 | ~$6.00 | ~$6.00 |
| Wood glue (exterior grade) | 1 | ~$5.00 | ~$5.00 |
| Sandpaper (80 + 120 grit) | 1 pack | ~$4.00 | ~$4.00 |
| Total | ~$55.50 |
Want to add a back? Pick up one extra 8-foot 2×4 and a few more screws, your total stays under $60.
The prices above are estimates based on typical retail pricing at major hardware stores in 2026. Prices vary by region and lumber grade, so always check your local store before buying.
Pro tip: Ask for “select” or “appearance grade” boards at the lumber yard. They’re straighter and easier to work with. Avoid boards with big knots near the ends, those spots crack under stress.
—
Cut List: Dimensions for Every Piece
This is where most free tutorials fail you. They show pretty pictures but skip the actual numbers. Not here.
This cut list is for a bench that’s 48 inches long, 16 inches deep, and 18 inches tall, a standard comfortable sitting height. All cuts come from standard 2×4 x 8ft boards.
Cut List for a Simple Bench (No Back)
| Piece | Qty | Length | Notes |
|---|---|---|---|
| Seat slats | 4 | 48 inches | Run lengthwise |
| Front/back legs | 4 | 17.5 inches | Vertical supports |
| Side stretchers | 2 | 13 inches | Connect front to back legs |
| Long stretchers | 2 | 44 inches | Connect left to right sides |
| Center support | 1 | 44 inches | Under seat, middle |
That’s 13 pieces total, all from standard 2×4 stock. A good lumber yard or the cutting station at Home Depot can make these cuts for you for about $0.25 per cut, totally worth it if you don’t have a saw.
How Long Should a Garden Bench Be?
Most outdoor bench designs run between 42 and 60 inches long. A 48-inch bench seats two people comfortably. If you’re building for three people, go 60 inches and add one more seat slat plus a center leg pair.
—
Tools You Need (As Few as 3 Tools)
This is a beginner-friendly project. Here’s all you need:
1. Circular saw or miter saw, to cut your boards. A Ryobi or DeWalt entry-level saw works perfectly here.
2. Drill/driver, to drive screws and drill pilot holes. Any cordless drill handles this.
3. Tape measure, because guessing is how you waste lumber.
Optional but helpful:
- A Kreg Jig for pocket hole joinery (makes the seat frame assembly cleaner and faster)
- Speed square, keeps your angles true
- Clamps, holds boards in place while you drive screws
Can you build a garden bench without power tools? Yes, a hand saw and a manual screwdriver technically work. But honestly, a drill will save you an hour and a lot of frustration. If you don’t own one, they’re under $40 at most hardware stores or borrowable from a neighbor.
—

Foto: https://kaboompics.com/ via Pexels
Step-by-Step Instructions: How to Build a Garden Bench
This is the full process, start to finish. Skill level: Beginner. Time estimate: 1.5 to 3 hours. Let’s go.
Step 1, Make Your Cuts
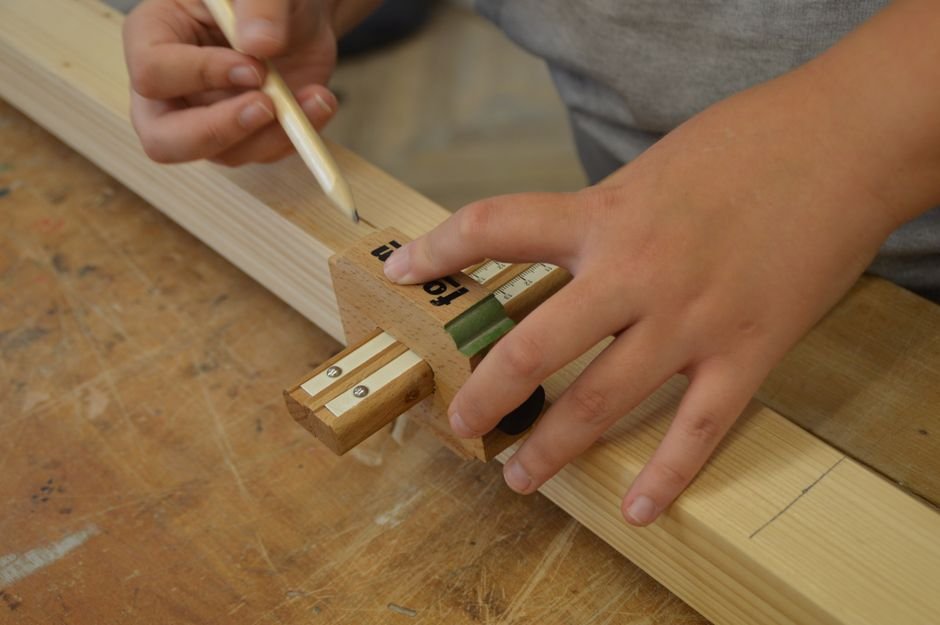
Using your cut list above, mark each board with a pencil before cutting. Always measure twice. Cut once. Label each piece with masking tape after cutting so you don’t mix them up.
Part of selecting timber for this project is also done right here at your saw, look at each board before you cut and orient any slight bow or warp so it works with the design, not against it. That small habit saves you a lot of headache later.
Smooth any rough cut ends with 80-grit sandpaper.
Step 2, Build the Leg Pairs (Nesting the Legs)
Pair up your four legs into two sets: front-left/back-left and front-right/back-right. Connect each pair with a side stretcher (13-inch piece).
Nesting the legs means positioning the stretcher so it sits flush with the outside edge of each leg. Drill pilot holes first, this prevents the wood from splitting. Drive two 3-inch screws through each joint. Add a dab of wood glue before screwing for extra strength.
⚠️ Warning: Skip the pilot holes and you will split the board, guaranteed. A 1/8-inch drill bit works for most exterior screws.
You should now have two H-shaped leg assemblies.
Step 3, Arrange Seat Frame (Connect the Legs)
Stand both leg assemblies upright, parallel to each other, 44 inches apart. Now connect them with your two long stretchers, one near the top front, one near the top back.
To arrange the seat frame correctly, the stretchers should be flush with the top of the legs on the inside face. Clamp in place before driving screws.
This is where the Kreg Jig shines if you have one, pocket holes make this joint fast and clean. Without it, drill pilot holes and use 3-inch screws from the outside face.
Step 4, Add the Center Support
The center support (your 44-inch middle piece) drops in between the two long stretchers at the midpoint. It reinforces the seat and prevents bounce when someone sits in the middle.
Secure it with two screws per end, through the side stretchers into the center support’s end grain. Pilot holes are non-negotiable here, end grain splits very easily.
Step 5, Attach the Seat Slats
Lay your four seat slats across the top of the frame. Space them evenly, about 1/4 inch gap between each board. A spare screw or a coin works great as a spacer.
Drive two screws per slat, per stretcher below it. That means each slat gets 6 screws total. Pre-drill every hole.
Tip: If any slat bows slightly, press it down with your hand or a clamp while driving the screws. The screw tension will pull it flat.
Your basic wood bench is structurally complete at this point. Now sand the whole thing with 120-grit paper. Round over any sharp corners, your legs and arms will thank you.
—
How to Build a Garden Bench with a Back
This is the variation most people actually want. And it’s not much harder, you’re basically adding a backrest frame to the simple bench you just built.
If you’re looking for free building plans with detailed diagrams, sites like Ana White and Woodworking for Mere Mortals have great visual references. Instructables also has community-built variations with photos at every stage. But you don’t need to leave this page, here’s everything you need.
Additional Materials for the Bench with Back
| Extra Piece | Qty | Length | Notes |
|---|---|---|---|
| Back posts | 2 | 20 inches | Extend from rear legs |
| Back rails | 2 | 44 inches | Horizontal back supports |
| Back slats | 3 | 44 inches | Vertical back boards |
One extra 8-foot 2×4 covers the back rails and slats. The back posts are extensions of your rear legs.
How to Build a Garden Bench with Back Posts
Here’s the key difference: instead of cutting rear legs at 17.5 inches, cut them at 36 inches. The extra 18.5 inches stick up above the seat to form the back posts. Everything else in the build stays the same.
Once your base is assembled:
1. Mark a point 2 inches above the seat slats on each back post.
2. Attach the lower back rail at that mark, screwing through the posts into the rail ends.
3. Attach the upper back rail 10 inches above the lower one.
4. Space your three back slats evenly across the two rails and screw them in.
The back angle is vertical (90 degrees) in this simple version. If you want a slightly reclined feel, which is more comfortable bench territory, tilt the posts back 5 to 10 degrees when you build the rear leg pairs. You’ll need to cut the feet at an angle to sit flat on the ground. It sounds tricky, but a 5-degree cut on a miter saw takes 30 seconds.
If you want a deeper look at free step-by-step plans for the bench-with-back version, including full size work drawings and MDF work drawings you can print, this resource covers both versions in detail, it’s one of the most complete bench plans guides I’ve come across for this skill level.
—

Foto: Tima Miroshnichenko via Pexels
Finishing and Weatherproofing Your Outdoor Bench
Your bench is built. Now let’s make sure it lasts more than one season.
Untreated wood left outside will start to grey, crack, and eventually rot. The good news is that protecting your wood bench takes maybe 30 minutes and costs under $15.
Step 1, Final Sanding
Go over the whole bench one more time with 120-grit sandpaper. Pay attention to the seat slats, any rough grain will snag clothing.
Wipe off all dust with a damp rag and let it dry completely before applying any finish.
Step 2, Choose Your Finish
Here are your main options for outdoor furniture protection:
| Finish Type | Best For | Durability | Cost |
|---|---|---|---|
| Exterior paint | Color, full protection | High | Low |
| Deck stain + sealer | Natural wood look | Medium-High | Low |
| Teak oil or Danish oil | Premium natural finish | Medium | Medium |
| Clear waterproof sealant | Invisible protection | Medium | Low |
For pressure-treated pine, exterior paint or a deck stain works great. For cedar or an oak garden bench, teak oil brings out the grain beautifully and feels more premium.
Step 3, Apply and Let Cure
Apply your finish with a brush or roller, working with the wood grain. Two coats is better than one. Let it cure fully (24-48 hours) before leaving the bench in rain.
How Do I Keep a Wooden Garden Bench from Rotting?
Three rules: seal the wood before it weathers, keep it off wet ground (rubber feet or a paver stone under each leg), and reapply your finish every one to two years. If you used pressure-treated lumber, you already have the main battle half-won.
—
Variations Worth Knowing About
Oak Garden Bench
An oak garden bench uses the same plans but swaps pressure-treated pine for white oak or red oak. Oak is heavy, dense, and ages beautifully outdoors. Expect to pay two to three times more for the lumber. The build process is identical, though you’ll want sharp saw blades and careful pilot holes since oak is much harder than pine.
Modern Garden Bench
Want a cleaner, more modern garden bench look? Use smooth-planed 2×6 boards for the seat slats instead of 2x4s (fewer slats, wider gaps), and paint everything matte black. Simple change, totally different vibe.
Can You Build This Bench in 30 Minutes?
Honestly, if you buy pre-cut lumber and work fast, a simple bench build, no back, basic frame, can come together in about 30 minutes. The 3 tools, 3-step assembly version I see circulating online cuts corners on joint quality, but it holds fine for light use. If you want it to last years with real use, budget 2 to 3 hours and do it right.
—

Foto: Ono Kosuki via Pexels
Advanced Techniques: Chopping Mortises and Shaping the Wood
Once you’ve nailed the basic build, you might want to push your skills further. Two techniques worth learning are chopping mortises and shaping your pieces before assembly.
Chopping mortises, cutting a square or rectangular slot into a board so another piece slots directly into it, creates a much stronger joint than screws alone. You don’t need this for the beginner version, but if you’re building an oak bench meant to last decades, it’s worth the extra hour. A sharp chisel and a mallet are all it takes.
Shaping refers to rounding, tapering, or profiling your boards for both comfort and looks. Rounding the front edge of your seat slats with a router or a sanding block, for example, makes a real difference in how the bench feels to sit on. These are the details that separate a bench that looks store-bought from one that looks homemade, in the best possible way.
—
A Versatile Bench for More Than Just the Garden
One thing people often overlook: this exact design isn’t limited to outdoor use. A versatile bench like this works just as well in an entryway, a mudroom, at the foot of a bed, or along a dining table. Swap the pressure-treated pine for poplar or maple, give it a coat of indoor paint or stain, and you’ve got a piece of DIY furniture that fits anywhere in the house. Same plans, same cuts, totally different setting.
—
Free Bench Plans and Full-Size Work Drawings
Several resources offer free building plans with full-size work drawings you can print at home. Ana White’s website has clean, photo-rich tutorials. Woodworking for Mere Mortals on YouTube walks through similar builds in real time. Instructables hosts community versions with hundreds of builds documented.
If you want a single package with MDF work drawings, full size work drawings, and plans you can actually hand to someone at the lumber yard, this guide bundles everything into one place and covers both the simple bench and bench with back in a format beginner woodworkers can follow without guessing.
—
Skill Level and Time Estimates at a Glance
| Version | Skill Level | Time Estimate | Cost Estimate |
|---|---|---|---|
| Simple bench (no back) | Beginner | 1-2 hours | Under $50 |
| Bench with back | Beginner, Intermediate | 2-3 hours | Under $60 |
| Oak garden bench | Intermediate | 3-4 hours | $80, $120 |
| Modern bench with angle cuts | Intermediate | 3-5 hours | Under $70 |
This is genuinely one of the best beginner woodworking projects you can start with. It teaches you the core skills, measuring, cutting, drilling pilot holes, assembling a seat frame, without overwhelming you. And at the end, you have something real sitting in your yard.
One last thing: if you’re nervous about getting the cuts or joints right the first time, grabbing a set of detailed bench plans with step-by-step photos removes almost all the guesswork. Sometimes a visual reference makes the difference between a project you finish and one that collects dust in the garage.
—
Frequently Asked Questions
How much does it cost to build a garden bench?
A basic DIY garden bench using pressure-treated 2×4 lumber from Home Depot or Lowe’s costs around $45, $55 in materials. Adding a back, hardware, and finish brings the total to under $60. That’s a fraction of what a comparable store-bought outdoor bench would run you.
What type of wood is best for an outdoor garden bench?
Pressure-treated pine is the go-to for a budget-friendly, rot-resistant wood bench. Cedar and redwood resist moisture naturally and smell great. For a premium build, an oak garden bench is dense and ages well, just budget more for lumber and a sharper saw. Part of selecting timber wisely is matching the wood species to where the bench will live and how much weather it’ll face.
How long does it take to build a garden bench?
The simple bench build takes 1 to 3 hours depending on your pace and tools. The bench with back version adds 30 to 60 minutes. Most people with basic woodworking experience finish both in a single afternoon. Beginners might take a bit longer, that’s completely fine.
Do I need special tools to build a garden bench?
No. This is a real 3 tools project: a saw, a drill, and a tape measure. A Kreg Jig helps for cleaner pocket-hole joints but isn’t required. Ryobi and DeWalt both make affordable entry-level kits that handle everything in this build.
How do I make a garden bench with a back?
Start by cutting your rear legs longer (36 inches instead of 17.5). Those extra inches become the back posts. Then attach two horizontal back rails between the posts and screw vertical slats across them. The full step-by-step is in the “Bench with Back” section above.
How do I weatherproof or finish a wooden garden bench?
Sand to 120-grit, then apply exterior paint, deck stain, or teak oil. Two coats beats one every time. Reapply every one to two seasons. Keep the legs off wet ground, a paver stone under each foot extends the life of your outdoor bench significantly.
📌 Enjoyed this content?
Mark diyfurnitureplans.com as your preferred source on Google and get more content like this directly in your searches.