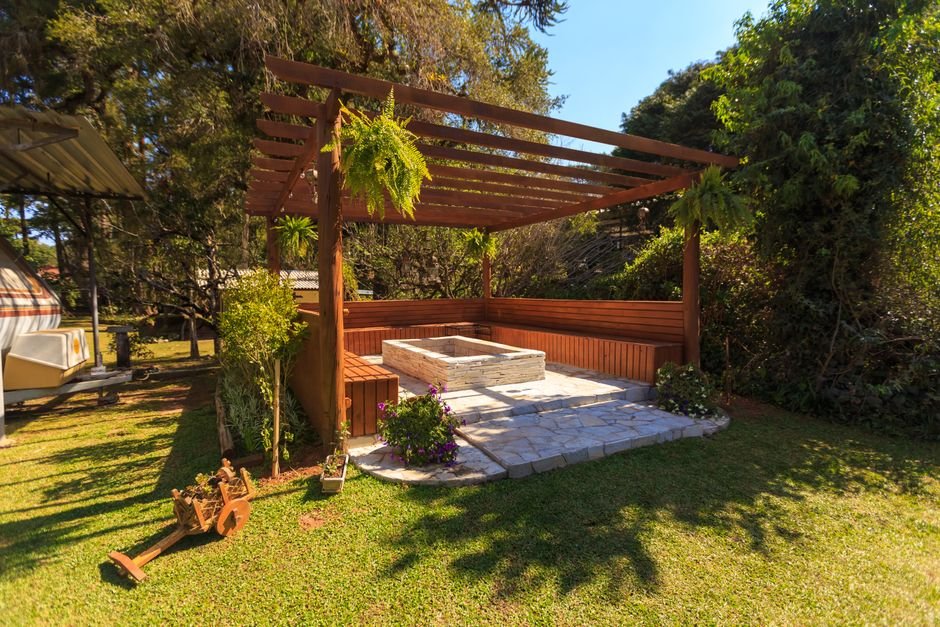
You can build a DIY pergola from scratch, even with zero woodworking experience. Pick a size, grab free plans, buy your lumber, and follow a simple step-by-step process. Most beginners finish a basic pergola in two weekends. That’s the short answer. Now let me walk you through every detail so you don’t waste a single board.
This article contains affiliate links. We may earn a commission on purchases made through them, at no extra cost to you.
✅ Quick Summary:
- A 10×10 or 12×12 simple pergola is the best starting size for beginners
- Free pergola plans with a cut list exist, and some are genuinely excellent
- Simpson Strong-Tie connectors make post-and-beam connections safer and easier
- Total material cost ranges from roughly $500 to $1,400 depending on size and wood
- You can do this solo, but a helper for post-setting day saves a lot of frustration
—
What Is a Pergola and Why Build One in Your Backyard?
A backyard pergola is an open outdoor structure made of vertical posts and horizontal overhead beams. Unlike a pavilion, patio, or arbor, it doesn’t have a solid roof. That open-grid design lets sunlight filter through while still creating defined shade, enough to make your backyard actually usable on a hot afternoon.
Here’s why I think it’s one of the best backyard additions you can make: it costs a fraction of a full deck or sunroom, it adds real visual weight to an otherwise flat yard, and you can build it yourself in a weekend or two.
Think about sitting outside with a cup of coffee under your own wood pergola, string lights overhead, maybe a climbing vine starting to grow up the posts. That’s not a luxury project, that’s a $700 build anyone can do with the right plan.
What’s the Difference Between a Pergola, Arbor, and Pavilion?
People confuse these all the time. Here’s a quick breakdown:
- Pergola, open overhead beams, partial shade, typically freestanding or attached to a house
- Arbor, smaller gateway structure, often arched, usually covered in climbing plants
- Pavilion patio arbor, fully roofed structure, protects from rain, more like an outdoor room
For most backyards, a pergola hits the sweet spot. It’s cheaper than a pavilion, bigger and more useful than an arbor, and still looks stunning.
—
Free DIY Pergola Plans for Beginners (Curated List)
One of the biggest mistakes beginners make is searching for free pergola plans and ending up with a blurry PDF and no cut list. I’ve filtered through the noise. Here are the sources actually worth your time.
Best Free Plan Sources for a Beginner Builder
| Source | Size Options | Includes Cut List | Difficulty | Notes |
|---|---|---|---|---|
| My Outdoor Plans | 8×8, 10×10, 12×12, 14×14 | ✅ Yes | Beginner | Best overall free plans |
| Ana White (anawhite.com) | 8×10, 10×12 | ✅ Yes | Beginner, Intermediate | Great community photos |
| Family Handyman | 10×12, 12×16 | ✅ Yes | Intermediate | More detail, more cuts |
| Reddit r/DIY | Various | Sometimes | All levels | Real builds, real feedback |
| Ron Hazelton (YouTube) | 10×10 | Partial | Beginner | Good for visual learners |
My Outdoor Plans free 12×12 pergola plan is the one I recommend most for first-timers. It’s clean, it includes a proper supply and cut list, and the dimensions are standard enough that you won’t be hunting for weird lumber sizes at the hardware store. Most of these sites also offer a free plan download, so you can have a cut list and diagram in your hands before you ever set foot in the lumber yard.
If you’d rather have a premium full tutorial with detailed blueprints, 3D renderings, and multiple size options all in one place, this complete pergola plan resource is worth checking out, especially if you want to skip the trial-and-error of piecing together free sources.
Are Free Pergola Plans Actually Usable for Beginners?
Yes, with one condition. Make sure the plan you choose includes:
1. A supply and cut list with exact board lengths
2. Specific post depth for your climate (frost line matters)
3. Hardware specs (post anchor size, beam connector type)
4. At least one diagram showing how the post and beam connection works
Without those four things, a “free plan” is just a pretty picture.
—
Materials, Tools, and Cut List You’ll Need
Let me give you a real, actionable list, not a vague “buy some lumber” paragraph.
Lumber List for a Standard 10×10 Simple Pergola
| Piece | Size | Quantity | Purpose |
|---|---|---|---|
| Posts | 6×6 x 10 ft | 4 | Vertical supports |
| Beams | 2×8 x 12 ft | 4 | Outer frame |
| Rafters | 2×6 x 12 ft | 6-8 | Overhead beams (top layer) |
| Shade slats (optional) | 2×2 x 10 ft | 8-12 | Shade structure top layer |
| Post bases | , | 4 | Anchor posts to concrete |
| Hardware bag | , | 1 | Joist hangers, screws, bolts |
⚠️ Important: Use pressure-treated lumber for all posts and anything close to the ground. For beams and rafters, pressure-treated or cedar both work well outdoors.
Tools You’ll Need
- Power drill and impact driver
- Circular saw
- Level (4-foot is ideal)
- Post hole digger or rented auger
- Tape measure and speed square
- Safety glasses and gloves
- Concrete mix (one 80-lb bag per post hole)
Estimated Cost by Size (2026 Pricing)
| Pergola Size | Est. Lumber Cost | Hardware | Total Range |
|---|---|---|---|
| 10×10 | $350, $550 | $100, $200 | $450, $750 |
| 12×12 | $500, $800 | $150, $250 | $650, $1,050 |
| 14×30 | $1,000, $1,600 | $250, $400 | $1,250, $2,000 |
These are rough estimates based on pressure-treated pine. Cedar adds roughly 30-40% to lumber costs.
—

Foto: Яна Леоненко via Pexels
How to Build a Simple Backyard Pergola: Step-by-Step
This is a two-part tutorial, post-setting day and framing day. Don’t rush it. Trying to do everything in one day is one of the most common beginner mistakes. If you’ve been searching for a true step by step tutorial that covers every stage from layout to final touches, this is exactly that, no steps skipped.
Step 1: Measure and Design Your Layout
Before you touch a shovel, measure and design your space.
1. Mark your four post locations using stakes and string
2. Use the 3-4-5 triangle method to confirm square corners (measure 3 ft on one side, 4 ft on the other, the diagonal should be exactly 5 ft)
3. Double-check your measurements. Then check again
4. Confirm your local frost line depth, posts need to go at least 6 inches below the frost line to stay stable
For a 10 ft x 10 ft pergola, your post holes should be placed at exactly 10 feet apart on center. For a 12 foot by 12 foot pergola, same rule, 12 feet on center.
Step 2: Dig Post Holes
Time to dig post holes. This is the hardest physical part of the whole build.
- Minimum depth: 24 inches in mild climates, 36-42 inches in cold climates
- Diameter: 10-12 inches per hole
- Rent a gas-powered auger if you have clay or rocky soil, don’t destroy your back with a manual digger
⚠️ Before you dig: Call 811 (in the U.S.) to have underground utilities marked. This is free and takes one phone call. Skipping it is genuinely dangerous.
Step 3: Set Your Posts
This is where you need a helper. A second pair of hands is not optional here, it’s a safety issue.
1. Pour 4-6 inches of gravel into each hole for drainage
2. Set the post in the hole and hold it plumb
3. Pour dry concrete mix around the post (dry pour method works fine for most climates)
4. Brace the post with two 2×4 diagonal braces nailed to temporary stakes
5. Check level in both directions with your 4-foot level
6. Let concrete cure for 24-48 hours before you touch anything else
To set your posts correctly, check plumb on two perpendicular sides. A post that’s even slightly off will cause problems later when you try to attach cross beams.
Step 4: Attach the Outer Beams
Once posts are solid, it’s time to build up.
1. Cut your 2×8 beams to length (add an overhang of 6-12 inches beyond each post for that classic pergola design look)
2. Lift the beam onto the posts, this is where a helper is critical again
3. Clamp the beam in place temporarily
4. Use a level to confirm it’s flat, then drill two 1⁄2-inch bolts through each post-beam connection
5. Repeat for all four sides
This is where Simpson Strong-Tie hardware becomes your best friend. More on that in the next section.
Step 5: Install Overhead Beams (Rafters)
The overhead beams go perpendicular to your outer frame beams, spaced evenly across the top.
1. Mark rafter positions every 16-24 inches across the top beams
2. Cut all rafters to the same length (with decorative end cuts if you want that classic look, a simple 45-degree angle works)
3. Set each rafter in place and use a joist hanger or hurricane tie to secure it
4. Drive exterior-rated screws through the top of each rafter into the beam below
For a basic pergola, 6 to 8 rafters on a 10×10 is plenty. Space them equally and your eye will thank you.
Step 6: Add the Shade Structure (Optional Top Layer)
Want more shade? Add a layer of 2×2 or 2×4 slats across the top of your rafters, running perpendicular to them.
- Space slats 2-4 inches apart for filtered light
- Space them tighter (1 inch) for heavier shade
- Pre-drill before screwing to avoid splitting the thin wood
When you attach shade slats to the top of your rafters, the visual impact is immediate, the whole structure looks finished and intentional rather than just an open frame. This layer is optional but makes a huge visual difference and adds real function on hot days.
—
Using Simpson Strong-Tie Hardware for a Safer, Easier Build
If you’ve spent any time on Reddit r/DIY or woodworking forums, you’ve seen Simpson Strong-Tie mentioned constantly. There’s a reason for that.
Simpson Strong-Tie Outdoor Accents hardware is specifically designed for exposed outdoor structures. Their post bases, beam connectors, and rafter ties are code-compliant in most U.S. jurisdictions, and they make a beginner build dramatically more secure.
Key Hardware Pieces to Use
- Post base (ABA series): Anchors your 6×6 post to a concrete pier, keeps wood off the ground
- Beam connector (BC post cap): Creates a strong mechanical connection between post top and beam, no relying on just bolts
- Rafter tie (H2.5A): Locks each rafter to the beam below, resists wind uplift
Using these connectors also means fewer massive through-bolts, which makes the build faster and the finished look cleaner. If you want to how to build a pergola with Simpson Strong-Tie, their website has a free guide with connection diagrams.
Structural hardware is the one place I’d tell any beginner not to cut corners. Lumber is cheap. Rebuilding a pergola that blew over in a storm is not.
—

Foto: Matheus Bertelli via Pexels
Best Pergola Sizes for Beginners (10×10, 12×12 and More)
How to Pick the Right Size for Your Space
The right pergola size depends on two things: what you’re putting under it and how much yard you have.
Here’s a practical guide:
| Use Case | Recommended Size | Notes |
|---|---|---|
| Bistro table for 2 | 8×8 or 10×10 | Cozy, manageable first build |
| Dining table for 4-6 | 10×10 or 12×12 | Most popular beginner size |
| Outdoor living room | 12×14 or 14×14 | Needs more hardware planning |
| Full patio cover | 14×30 or custom | Two-person build minimum |
10×10 vs 12×12, What’s the Real Difference?
A 10 ft x 10 ft pergola is the easiest build: less lumber, fewer cuts, lower cost, and small enough that one person can manage most of it.
A 12 foot by 12 foot pergola gives you noticeably more breathing room underneath. That extra 2 feet per side sounds small, but it’s the difference between a tight fit and a comfortable outdoor space. Most experienced DIYers say if your yard can handle it, go 12×12.
If you’re looking at lean to pergola plans, where one side attaches to your house instead of a freestanding fourth post, a 10×12 or 12×16 rectangular footprint tends to work best. The Lean-to pergola style is actually great for smaller yards because it uses existing wall space instead of taking over the whole lawn.
For a modern pergola look, go with clean-cut post tops, no decorative curves, and tight rafter spacing. Simple lines, great contrast.
If you want plans sized exactly for your space, including a 14×30 outdoor pergola layout, this resource has downloadable plans for multiple configurations that are specifically built to be easy DIY build friendly.
—
Tips, Hardware Recommendations, and Common Beginner Mistakes
You’re almost ready to build. But before you order materials, read this section, it’s where most beginner projects go wrong.
Common Mistakes on Reddit r/DIY (And How to Avoid Them)
People on Reddit r/DIY post about pergola failures constantly. The patterns are consistent:
1. Skipping the level check on posts, a post that’s 1/4 inch off-plumb looks fine at ground level and terrible once the beams are up. Check plumb twice per post, minimum.
2. Using the wrong screws, standard drywall screws corrode outdoors within a year. Use exterior-rated structural screws (Torx head, coated for weather). GRK or Spax are good brands.
3. Not calling 811 before digging, I mentioned this already. Do it.
4. Buying materials before finalizing measurements, only buy all your materials after your layout is staked, confirmed, and your cut list is finalized. Returning 20 boards to the lumber yard is a miserable afternoon nobody wants.
5. Skipping wood treatment, if you’re using pressure-treated lumber, cut ends need to be treated with end-cut preservative. Moisture gets in at the cut.
6. Underbuilding the post depth, posts that don’t go deep enough shift and lean. In frost-prone areas, this destroys a pergola in two winters.
Finishing Touches That Make a Big Difference
Once the structure is up, here’s how to make it look finished:
- Sand any rough edges on rafters and beams, splinters on an outdoor structure are annoying and avoidable
- Apply a UV-resistant stain or sealer within 30 days of construction, especially on cedar or pine
- Add fascia boards to box in the outer beam edges for a cleaner look
- String lights along the rafters, this single touch transforms the feel of the space at night
To truly beautify your backyard and relax in shade, the finishing details matter as much as the structure itself.
Can You Build a Pergola Alone?
Honestly? The framing part, yes, with clamps and patience. But post-setting day is really a two-person job. A post sitting in wet concrete while you try to brace it, check plumb, and not drop your level is genuinely stressful alone.
Get a friend for day one. Buy them lunch. It’s worth it.
This is an easy DIY build that anyone can do, but “alone start to finish” is harder than it needs to be. Work smart.
This Is a Great Pergola for Beginners, Really
I want to say this plainly before you scroll away: a basic square pergola is one of the most forgiving first builds out there. The tolerances are generous. The tools are simple. And unlike furniture, nobody’s measuring your post spacing with a ruler.
If you can follow directions and take your time, you can build this. The pergola for beginners label isn’t just marketing, it’s accurate. Start with a 10×10, use a solid plan, and don’t skip the hardware.
—
If you want a full tutorial with cut-and-paste shopping lists, pre-made diagrams, and plans for everything from a basic 10×10 to a large outdoor pergola, check out this complete beginner pergola plan package. It’s the shortcut to skipping the research phase entirely.
—
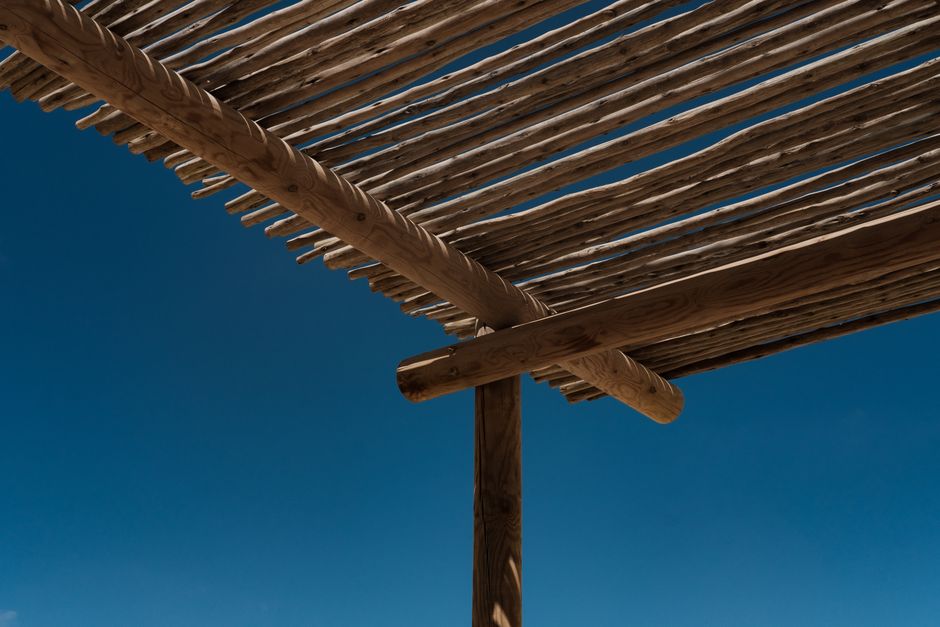
Foto: viktoriia kalganov via Pexels
FAQ
What is the easiest pergola to build for a beginner?
A simple 10×10 square pergola with four posts and basic overhead beams is the easiest starting point. It uses standard lumber sizes, requires minimal cuts, and can be completed in a weekend with basic tools.
How much does it cost to build a DIY pergola?
A 10×10 DIY pergola typically costs between $450 and $750 in materials using pressure-treated pine. A 12×12 version runs closer to $650 to $1,050 depending on wood type, hardware, and local lumber prices.
What size pergola is best for a small backyard?
A 10×10 pergola is ideal for small backyards. It fits a dining table with four chairs comfortably without dominating the space. If you have a little more room, 12×12 is the most popular all-around size.
Do I need a permit to build a pergola in my backyard?
It depends on your city or county. Many areas require a permit for structures over a certain square footage or height. Always check with your local building department before you start digging post holes.
What wood is best for building a pergola?
Pressure-treated pine is the most affordable and widely available option for beginners. Cedar and redwood are naturally rot-resistant and look beautiful, but cost 30-40% more. Never use untreated pine outdoors, it will deteriorate quickly.
How long does it take to build a pergola from scratch?
Most beginners finish a simple 10×10 or 12×12 pergola in one to two weekends. Day one covers digging and setting posts. Day two covers beams, rafters, and optional shade slats. Add a day if you’re staining or painting the finished structure.
What is the difference between a pergola, arbor, and pavilion?
A pergola has open overhead beams that provide partial shade. An arbor is smaller and usually marks a garden entryway. A pavilion patio arbor has a solid roof and gives full rain protection, it’s more like an enclosed outdoor room.
📌 Enjoyed this content?
Mark diyfurnitureplans.com as your preferred source on Google and get more content like this directly in your searches.
Leave a Reply